Managing Backups Using cPanel on Shared Hosting
This comprehensive information educates readers about the process of operating backups in a shared hosting environment.
Why is it advisable to use cPanel for managing backups in UK shared hosting?
To begin with cPanel is not just the ordinary control panel but a product for web hosting. It is user-friendly offering an orderly icon-based design for efficient control of your website. Some hosting providers refer to cPanel as a multi-functional platform that provides absolute control minus complicated features.
cPanel’s interface resembles image-based OS (operating systems) for a gratifying natural experience. What distinguishes cPanel? Even those without experience in web hosting can navigate the system easily. Simply use the basic categories and symbols as a guide to find your way around.
It may be very accessible; even then, cPanel remains one of the most potent interface in hosting. For example, users of WordPress Content Management System (CMS) can administer most components of their websites without logging in to the WordPress backend. The interface provides multiple options. It is a notch above convoluted control panels in the market.
cPanel is an efficient way of managing your website. It runs on Linux. This free and open-source OS is ideal for both servers and desktops. Majority of servers operate on this system. It ensures abundant power supply as well as covers the entire suite in a user-friendly interface.
What are Backups?
Backups comprise an essential aspect of website administration. You will not find it hard to restore files as well as configurations if you store backup copies in any secure location. Recovery comes easy if an unexpected glitch prevents the site from functioning properly. Users may create backup files or folders anytime.
This is useful practice if you want to implement significant modifications to your site without waiting for the scheduled weekly or daily backups. Backups can be partial or complete. This tutorial presents a step by step in performing a full cPanel backup for your hosting account.
cPanel makes use of a built-in tool to help users in creating these backups. You can produce a compressed zip file through this utility. Download to your computer for efficient storage. Users are not permitted to keep backup files in the File Manager. Storage is designed for the server. Full backup represents the safest technique in ensuring all your files and emails remain protected. There is no risk of possible deletion.
Creating Full Backup
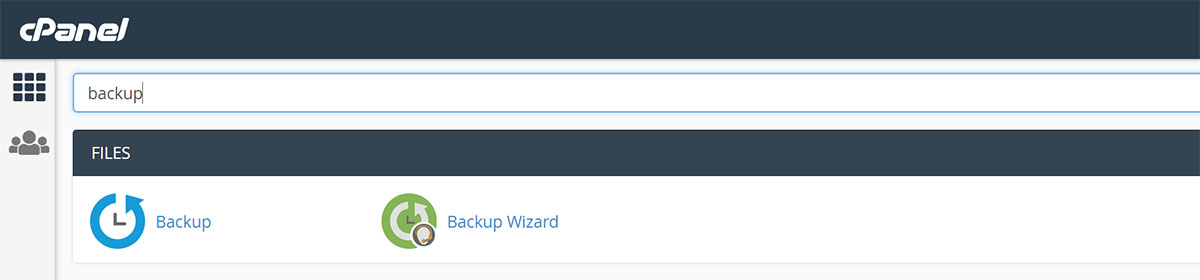
- Click Backups which you can find at cPanel Home Screen’s Files Section.
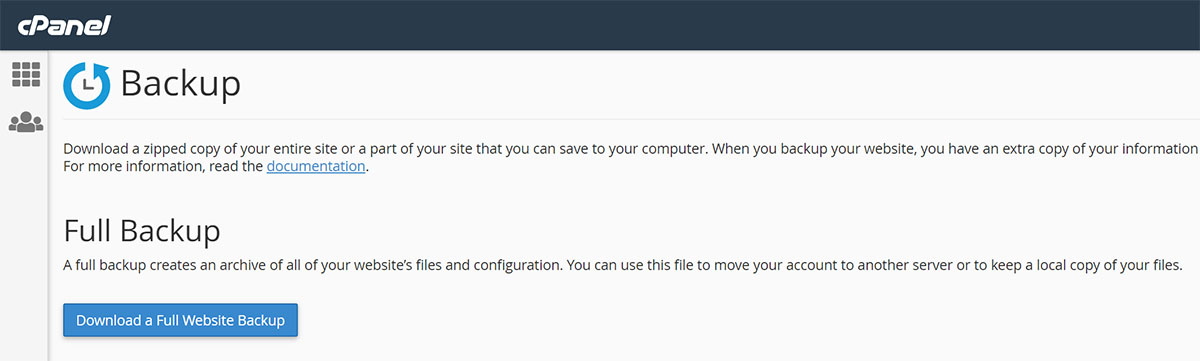
- Click Download or Generate Full Website Backup under the Full Backup tab.
- Choose the location where you intend to save the backup file from the list box of Backup Destination.
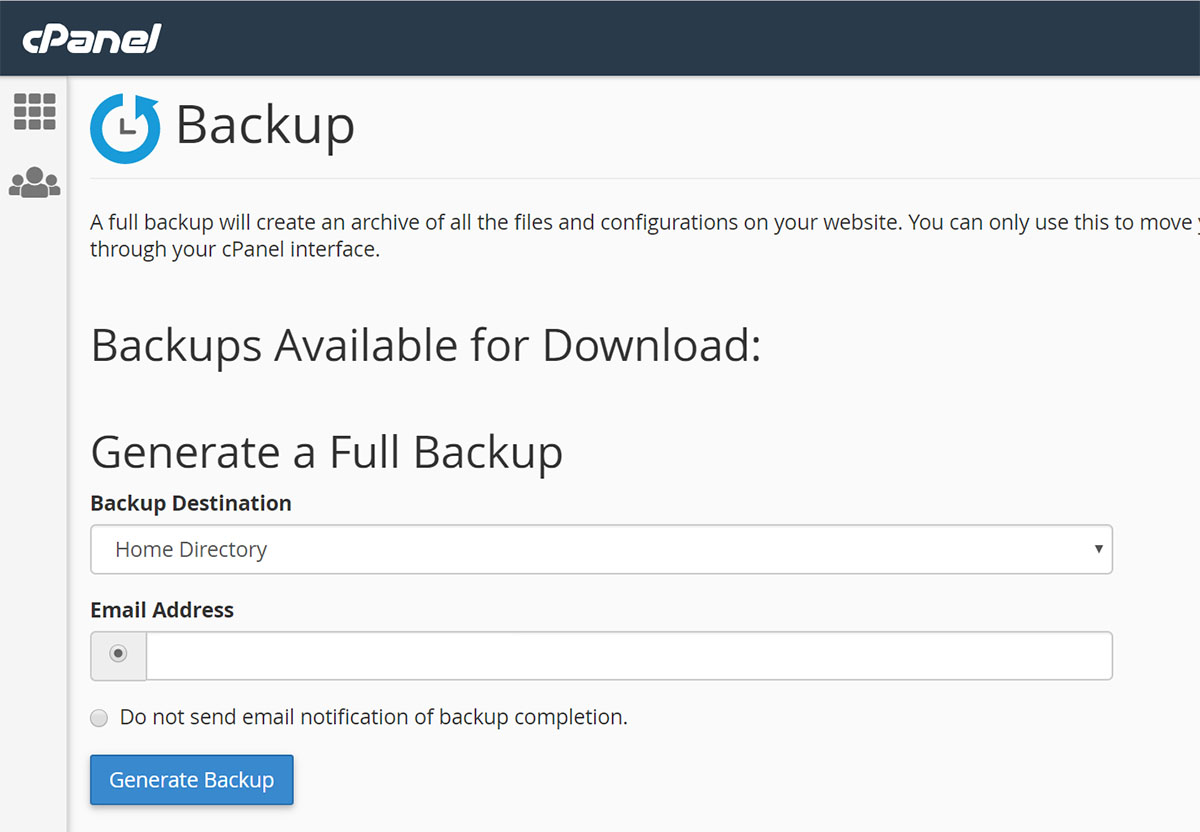
You may save these files in the Home Directory. Otherwise, transfer said files to a different website using Secure Copy (SCP) or File Transfer Protocol (FTP). Input the remote server name, user name, and password if you use either protocol.
- Do not send any email notification of the backup completion. This is if you do not like to receive an email notice once the process is completed.
- Click the Generate Backup icon.
Download Website Full Backup
You are free to download backup files after creating a complete backup of your site. Follow these steps to perform the download:
- Click Backups in the cPanel Home Screen Files Section.
- Click Download or Generate Full Website under the Full Backup.
- Click the file you choose to download under the Backups available for Download.
Restore Full Website Backup
Full website backup restoration calls for the entire deletion of all the data in your account. Data made or uploaded to your account after backups were generated will be erased after the process of restoring. It is not possible to implement complete website backup for managed packages that do not have any root access.
Consult your hosting provider for any questions. Follow these steps if you want full website backup performed by your web host.
- Upload the complete website backup to your cPanel account’s home directory.
- Make a support ticket that requests backup restoration.
Users of cPanel with root access must follow these measures:
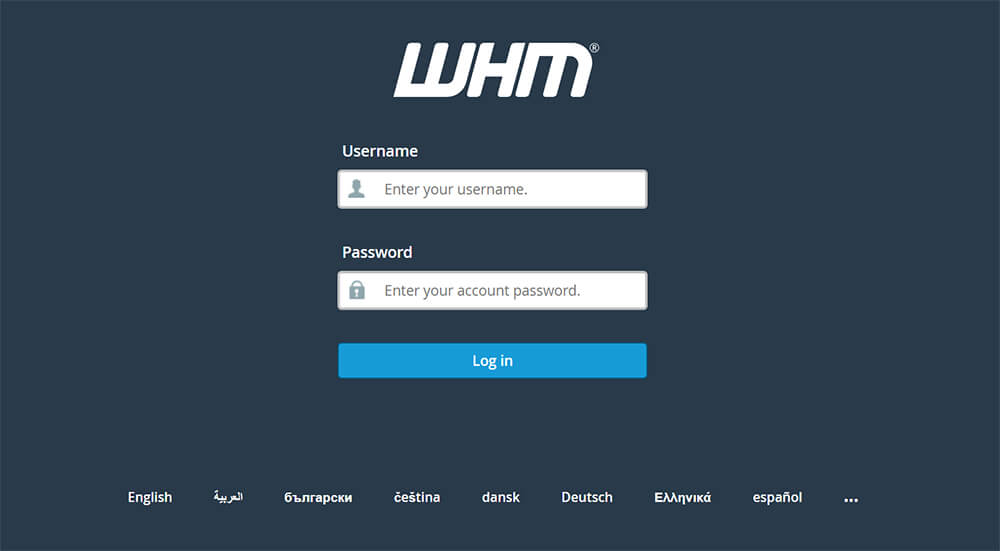
- Log in to Web Host Manager (WHM). Choose the command, Restore Full Backup and CP command Move Files from the left column.
- Check the required file name format at the Restore Full Backup and CP Move File Page. See to it the backup for restoration makes use of one of the mandatory formats.
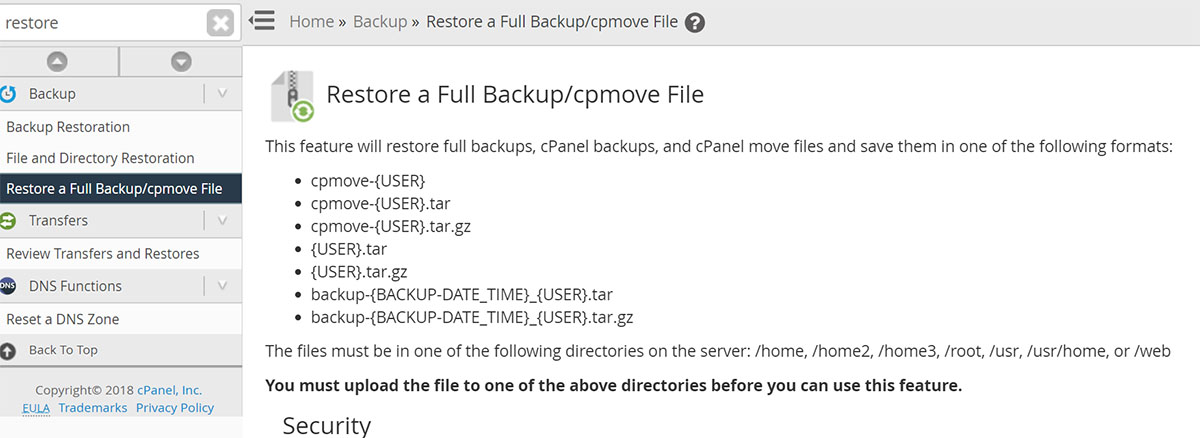
- Use the FTP or Secure File Transfer Protocol (SFTP) in uploading the complete website backup to any directory mentioned on the Restore Full Backup and CP Move File Page.
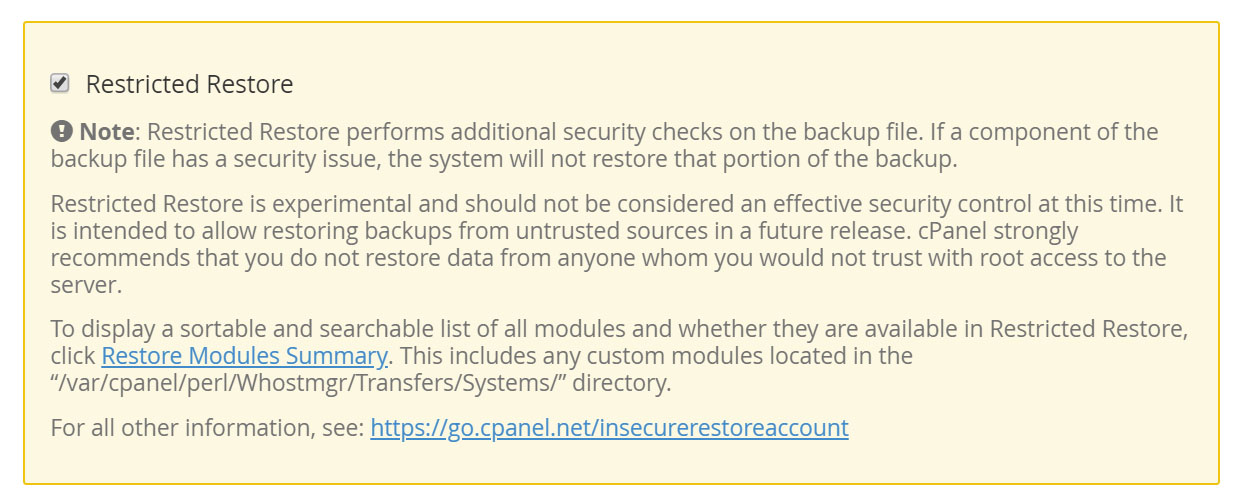
- Choose the Restricted Restore if it does not come out as default.
- Go to the Transfer Method section. Choose Restore with Username.

- Look for the account you want to recover in the Username. In the list box, pick the backup’s username for restoration.
- You can skip the section on A Records for restoring an existing account.
- Choose Overwrite the Existing User’s
- Click the Restore
Download and Restore Partial Backup
Stick to the prescribed steps.
- Click Backups. You can find this in the cPanel home screen’s Files Section.
- Navigate to Partial Backups. Click the backup file’s name. This must be the file that you prefer to download. These are the types of backup that are normally available depending on the site’s configuration:
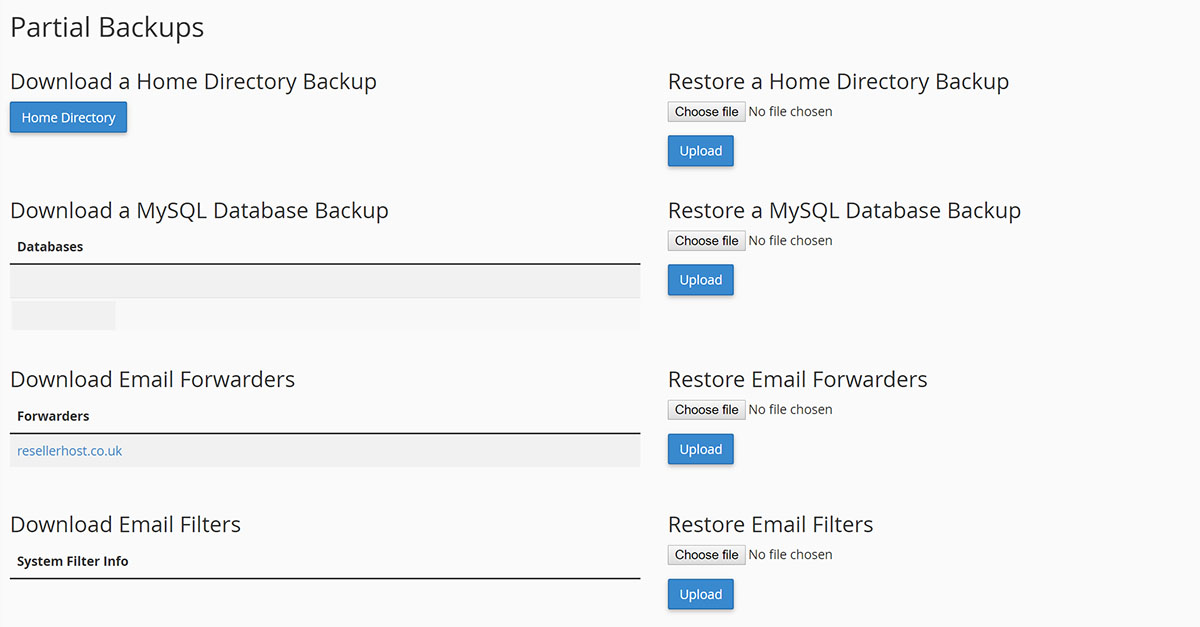
- Home Directory – It is also known as the Login Directory in Unix-like OS serving as storage for personal file, programs, and directories of users.
- MySQL Databases – The open-source database is the most popular worldwide because of the efficiency, power, and user-friendliness.
- Email Forwarders – Email forwarding refers to resending email messages sent to the user’s email address.
- Email Filters – The email filtering process refers to sorting out email based on specific criteria.
To restore the present partial backup, click Browse in the Partial Backups section. Look for the partial backup file. Click Upload.
Website File Backup
It is possible to back up your website files in the Home Directory manually or automatically. For manual backups, log in to your cPanel account with Secure Shell or SSH. Replace the Username with your hosting account username. The command creates a compressed file containing all files in your Public_HTML Directory.
For scheduled automatic backups, install Cron Job, the Linux utility that schedules the script or command on your server to run without human intervention at the chosen time and date. You may use cPanel or configure Cron Job from the Command Line. Just indicate the backup interval (weekly or monthly). Automatic and manual backups also apply to MySQL databases.
Backup Manager
The Backup Manager’s previous version allowed users to produce, download, and retrieve the following from the hosting account’s latest backup:
- Files
- Directories
- Databases
The latest feature enables the end-user to specify a directory or database. You may also indicate the backup date from the calendar. This specifies when you want to get back the information. With the latest version, you can also regain files, directories, and databases from various dates. It will depend on the required information as well as number of backups supported by multiple hosting packages. Said process allows prompt recovery of information.
You have the option to download the previous generated system archive of your hosting account data and download to the personal computer. This data includes the following:
- Files
- Emails
- Databases
- Email Forwarding and Filter Preferences
It is a helpful option if you wish to maintain a local copy of the backup file or restore certain data.
More on cPanel
When it comes to the efficient management of backups utilizing cPanel in shared hosting, here are additional points and information that you must understand:
cPanel control panel is designed to manage server settings. It has the capability to support various features for the following functions:
- Managing files and folders
- Configuration of Domain Name System (DNS) records
- Administering domains and sub-domains
- Controlling emails and databases
To access cPanel, sign in to your account and proceed to the dashboard. Choose My cPanel from the navigation menu at the topmost portion.
Your cPanel control panel layout consists of several setting categories. Each one contains a variety of icons. The list of available options is extensive. You can view a setting through the toolbox search bar. This is close to the control panel.
Lastly, the Files Section offers users different tools for managing folders and files stored in the server. These tools consist of the following:
- File Manager is meant for controlling, uploading, and downloading server files.
- Disk Usage monitors consumption of disk space by files, folders, email accounts, and databases. It also supplies the links to the File Manager as well as MySQL to erase files and databases
- File Transfer Protocol takes care of reviewing and managing the active FTP connections.
- Backup Wizard preforms the backup functions for all data stored in the cPanel account.
- Other relevant tools include Web Disk, images, Directory Privacy, File Restoration, and FTP accounts.
If you wish to deal with issues and need advice, make sure to employ an experienced and competent web host in the UK.
To learn more about File Transfer Protocols, visit and read Using File Manager in cPanel on Shared Hosting