Using File Manager in cPanel on Shared Hosting
Learn how to manage your website using File Manager in cPanel using this guide.
cPanel remains as the most widely used application in the UK and elsewhere for efficient website administration. Through its point and click interface, users can navigate their sites seamlessly. Majority of hosting providers offer this Linux-based control panel which has turned out as a benchmark in this industry.
File Manager
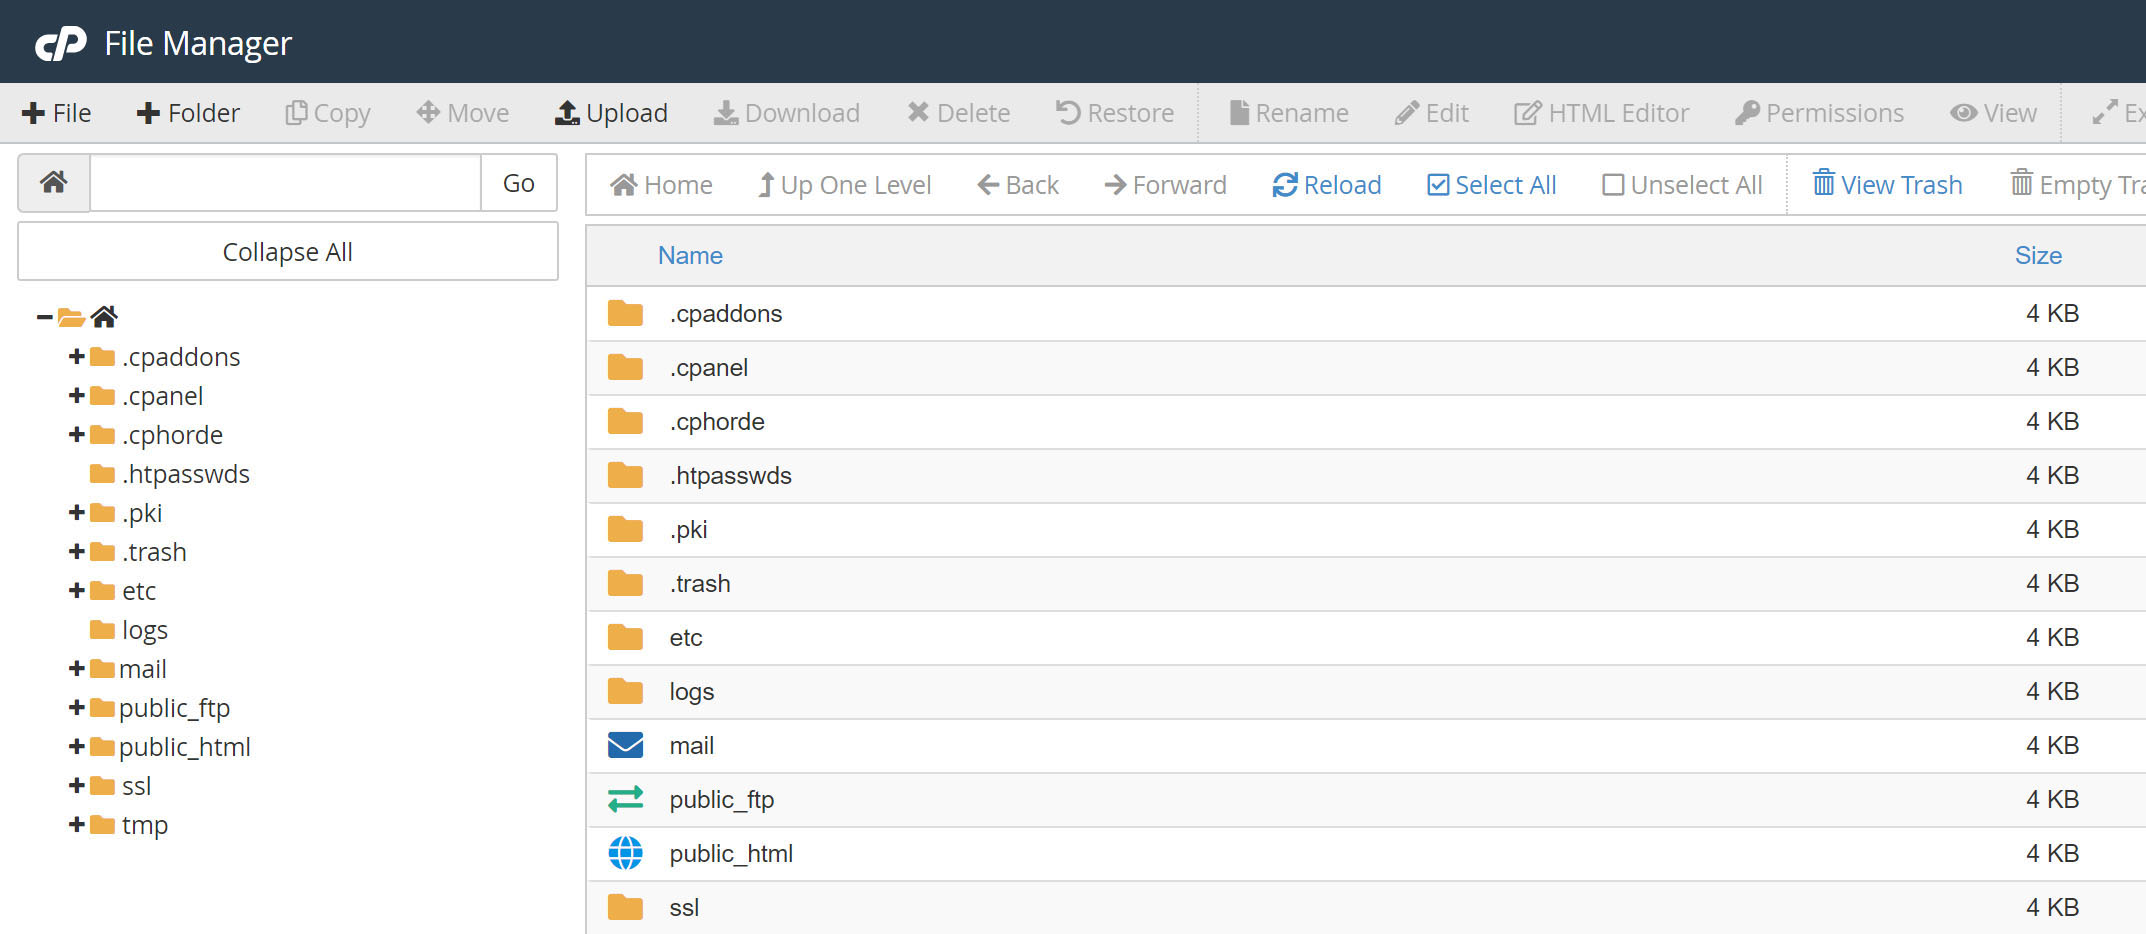
The File Manager of cPanel offers a user-friendly process for editing, uploading, removing, copying, and managing hosting files from your web browser. Its layout looks natural. At the left, you will find the directory for accessing folders quickly. At the right is the directory listing all files and folders. Now you can familiarise yourself with the procedures of navigating through this system. Look for the File Manager tool that you should find in the browser.
You can upload, download, or change files related to your hosting package from browsers like Google Chrome, Firefox, Explorer, Opera, Netscape, and others. Functions associated with your files include the following:
- Create, upload, or delete
- Organise into folders
- Modify file permissions
The tool may not function as replacement for more sophisticated File Transfer Protocol (FTP) clients. However, it contains all fundamental functionalities for managing simple websites. Access File Manager through these steps:
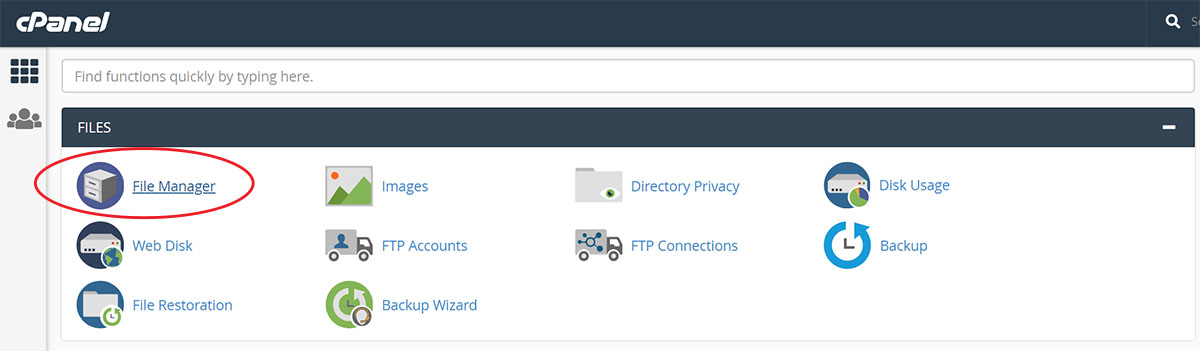
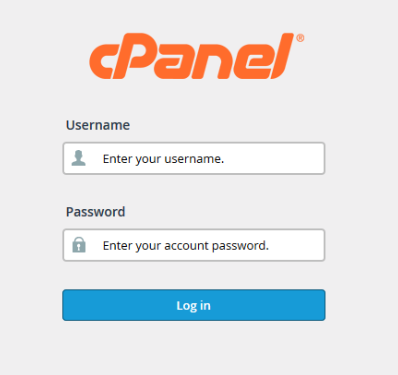
- Log into cPanel.
- Click the File Manager
- You must set several options like the folder you want to open. There is the option of displaying or not the hidden files [.htaccess] and setting default configurations to avoid showing pop-up screens in the future.
For uploading files in File Manager:
- Move to the folder where you choose to upload files.
- Click the Upload and Browser
- Look for and double-click the initial file to begin the uploading process automatically.
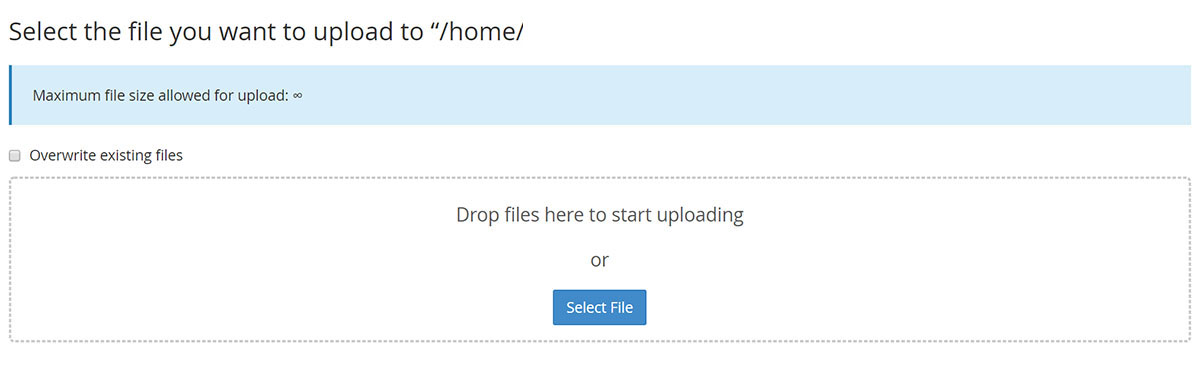
- Repeat the last three steps for all the files you want to upload.
- Click the box that says Overwrite Existing Files if you intend to replace current files in the folder with new ones using the same name.
Remember these two points:
- It is possible to download any file from the web server directly to your computer using the Download option from File Manager.
- Or, copy and transfer files between folders by means of Copy and Move File Another function is Rename or Delete for modifying specific files in the directory.
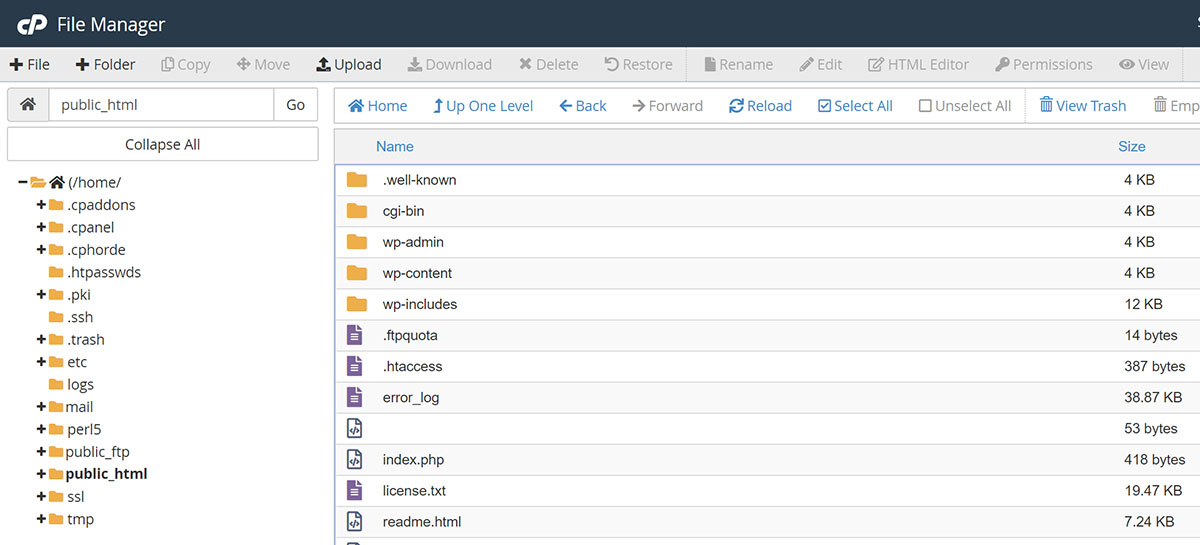
Always keep in mind that you must upload files at the Public_HTML directory if you want these to show online as your Primary Domain name. It refers to the domain name where you initially registered the hosting account. You will find out the appropriate directory in cPanel for Addon Domains: cPanel>>Addon Domains. These are listed at the far end of the web page.
Start the File Manager
Users can expect the cPanel File Manager to make browsing through website directories easier. Go through these steps carefully in starting the File Manager and move across the directory’s structure.
- Click the File Manager in the cPanel’s home screen Files Section.
- Choose the directory that you wish to open. Click Go so the main window of File Manager opens.
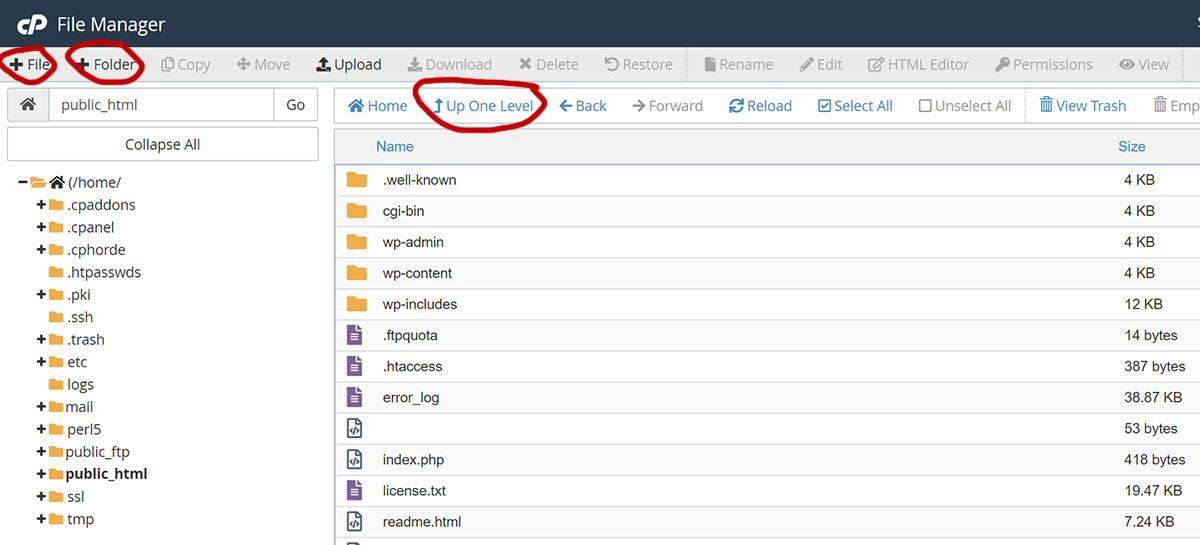
- Look through the directory’s hierarchy.
Click the directory’s name to see the entire folder.Click the icon that says Up One Level to move up one level in your file system.
Click the + Icon to expand the directory.
Click the – Icon to collapse the directory.
Create Additional Folders and Files
Stick to these guidelines in creating new folders or files in File Manager.
- Click the New Folder tab at the File Manager’s main window.
- Input this folder’s name or title at the New Folder Name Text Box.
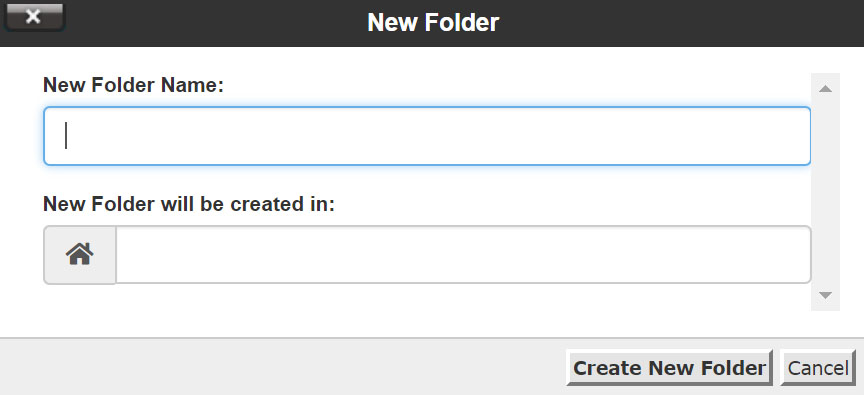
- See to it this is the path for creating the new folder.
- Go ahead and click Create New Folder.
These are the steps for creating new files.
- Click the New File icon at the main window of the File Manager.
- Enter the new file name at the New Folder Name Text Box.
- See to it this is the path for creating the new file.
- Go ahead and click Create New File.
Copy, Delete, Move, and Rename Files
To accomplish these functions, follow this guide:
- Identify the files at the main window of the File Manager.
- Perform the desired file operation.
Copy the file or files. Click the Copy button and enter the destination directory. Click Copy File(s).If you want to move a file or files, click the Move button and enter the destination directory. Click Move File(s).
If you want to rename a file or files, click the Rename button and enter the destination directory. Click Rename File(s).
If you want to delete a file or files, click the Delete button and enter the destination directory. Click Delete File(s).
For restoring files that you deleted accidentally, recover these documents from the Trash folder unless you already checked Skip the Trash which permanently erases the Files option.
- Go to the Toolbar and click View Trash.
- Choose file or folders you wish to restore.
- Click Restore. You can find this command at the topmost toolbar.
- Confirm Restore.
How to Search for Files
Use File Manager in searching for files.
- Choose your preferred location in looking for the file at the Search List Box. You can find this at the top right corner of the File Manager’s main window. These are the locations where you can find files.
Home Directory and Sub-Directories
Public_HTML Directory
Current Directory
- Enter the file name at the text box. Click Go.
You may type incomplete file names for searching assuming the files still exist and have not been deleted.
Changing File Permissions on Linux Servers
Incidentally, it is also important to learn about modifying File Permissions on your server. The Linux-based system contains formidable security features. However, one vulnerable area is the granting of local access. This refers to file permission-based concerns from users who fail to assign the right permissions for files as well as directories.
Permissions are crucial to data protection in the Internet. Users can define permissions based on their preferences for level of access. Part of security upgrading practices include file protection from writing and editing. You can look forward to the following tutorial in assigning the proper permissions to such files. cPanel is one of the easiest methods in assigning permissions.
- Navigate to the cPanel File Manager.
- Choose the file where you plan to provide permissions.
- Click Change Permissions Link.
- Look for the applicable permissions.
- Press the Change Permissions
Popularity of cPanel
This control panel is suitable for web hosts offering Linux Hosting. cPanel enables the user to manage the smallest details of hosting including logins and email addresses with simple navigation as well as interface.
Hosting firms that utilise cPanel enjoy these benefits:
- Employ standard help documentation.
- Users can use the control panel features regardless of web host.
- cPanel helps users to avoid performing unauthorised functions.
- Web Host Manager and cPanel are compatible, providing users with an unfailing experience.
- WHM provides simple administration of several websites along with manageable cPanel backend.
- WHM and cPanel are secure if managed correctly.
It is the only hosting app that gives users authority in the efficient management of their hosting accounts. Multiple features will assist you in organising emails, files, domains, website security, and other features. These advantages cover the following areas:
- File Manager – With cPanel hosting, you can look forward to file manager features for easy download of files to the server, as well as upload of files from the server. With this unique feature, you can move files all over your website by redirecting the Uniform Resource Locator (URL). Users can also create sub-domains where these files are found.
- Management of Databases – cPanel permits users to organise their databases. You can create the MySQL database making use of phpmyAdmin features. This free and open-source admin tool for MySQL is popular among webhosting firms. The data management features also allow simple backup of files.
- Complex Domain Management – This control panel helps users create several domains on a single account. Only your hosting provider can limit the number of domains using that single account on cPanel.
- Specific Statistics – cPanel provides comprehensive statistics or data on various essential variables like the number of website browsers or visitors, pages these visitors viewed, the most-viewed web pages, the IP addresses of viewers, visitors who returned to the website, OS (operating systems), website rankings, browsers, and others. This information aids the website owners to meet their requirements as well as their respective clients. It also facilitates the production of Search Engine Optimisation-friendly sites.