Web Host Manager Tutorials
Web Host Manager (WHM) is the administrator backend/reseller center area where you add, modify and delete cPanel accounts under your reseller plan.
This tutorial describes main features of WHM. It is useful for beginners and non-root users.
You can also find full WHM documentation with advanced features here.
Use any of these URLs to login to WHM:
https://servername/whm
http://mysite.com/whm
http://mysite.com:2086
https://mysite.com:2087
Note: A colon symbol that follows an IP address or domain name signifies a specific port number. These port numbers guide data packets transmitted between 2 computers to specific processes on either machine.
You may receive this message while using secure connection (port 2087):
This Connection is Untrusted
Please disregard this warning since the certificate used for cPanel/WHM/Webmail connections is issued to the server hostname, not for the domain name used in the link. This is why browsers may deem it as invalid. All you have to do is add your website URL to the trusted sites so you won’t get this warning anymore.
In Firefox:

WHM – secure connection
Learn how to add a trusted site to:
Use this WHM demo to test the options that are available so you will know more about what you are subscribing to.
Packages
To create an account, you need to first come up with a Feature List and Package where you assign account quotas. You can assign one package to multiple cPanel accounts. You may enter account quotas manually without using a package. This is useful only if you want to set a unique quota for one single account.
Feature Manager
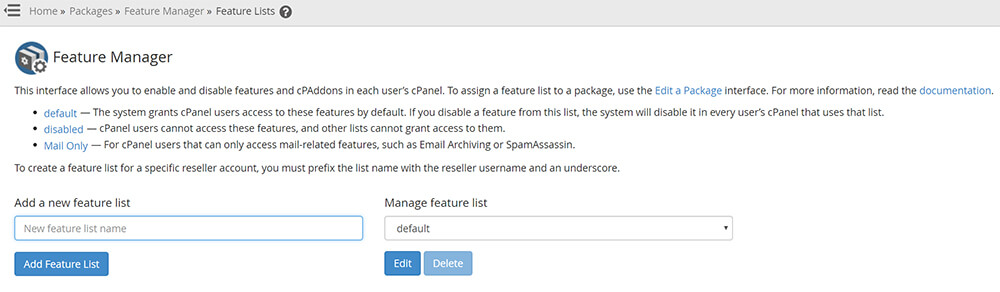
The feature manager allows you to disable or enable features inside each user’s cPanel. If you build a feature list, edit the package you want to assign to it and add the feature list.
Main > Packages > Feature Manager
Add a Package
This is where you set disk space, bandwidth, the number of domains, and FTP accounts.
Main > Packages > Add a Package
You may edit or delete the package in the left panel under ‘Packages’ menu.
Account Functions
Create a New Account
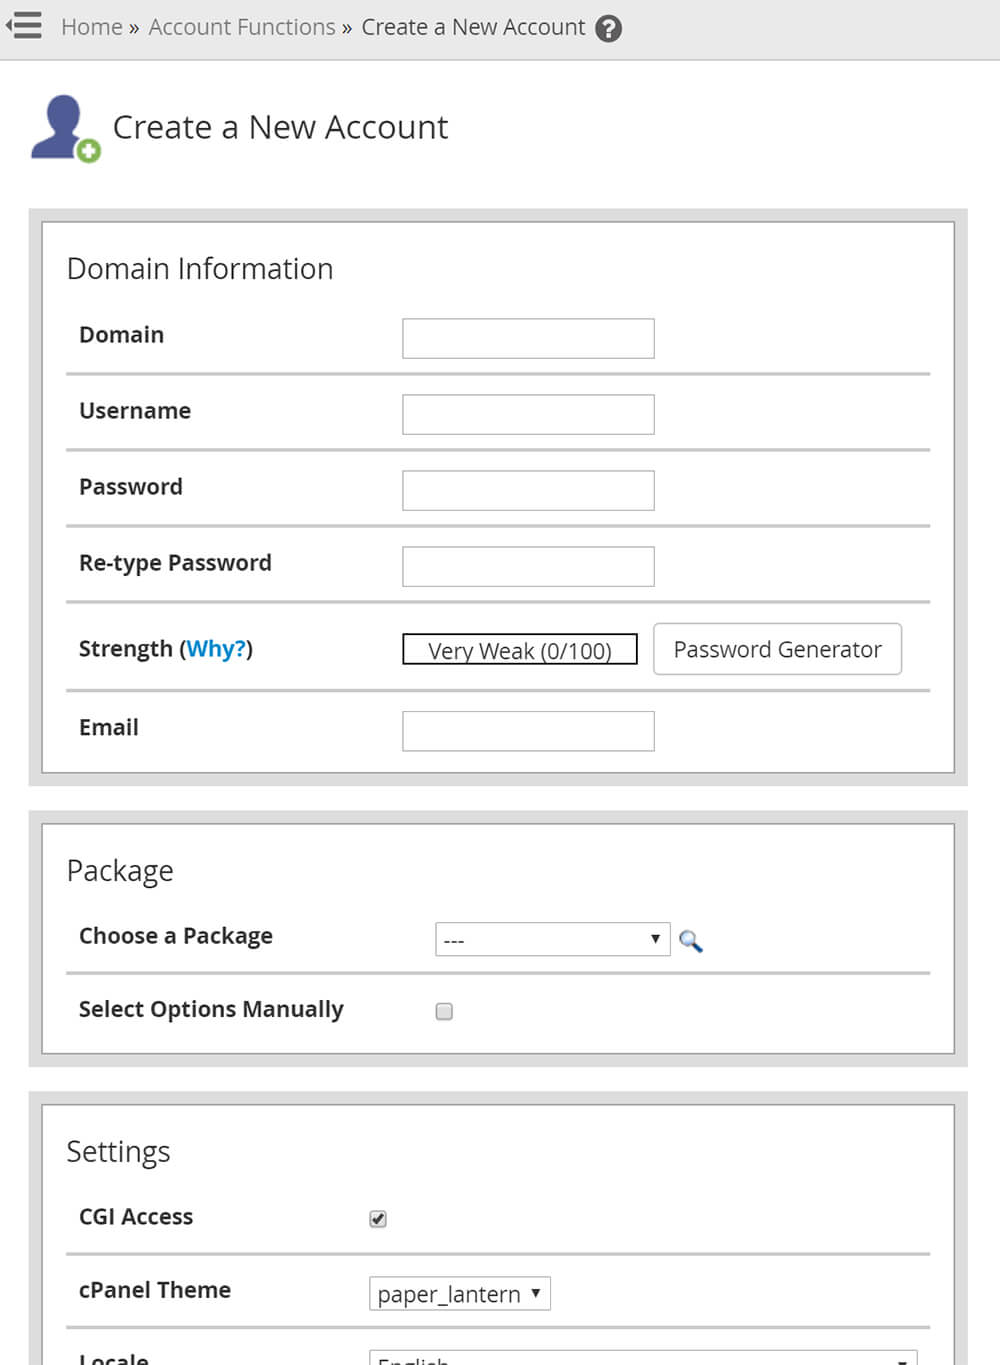
Main > Account Functions > Create a New Account
- Set the main domain, cPanel passwordand username. The username is usually the first 8 characters of the main domain, but you can manually type any username you wish although it cannot start with a number.
- Select a Package that you created previously from a drop down list.
- Localedefines default language of a cPanel interface.
- Your reseller nameservers are set by default in DNS Settings. You should check ‘Use the nameservers specified at the Domain’s Registrar’ only if the main domain will use third-party nameservers. In many cases, leave local (your own reseller) nameservers.
- Mail Routing Settings
- Local Mail Exchanger – must be used if the email for a cPanel account is served by local (Jolt) mail servers. It is a default value.
- Check Remote Mail Exchanger – if the email for a cPanel account is served by third party mail servers like Google.
The email service may not function properly if you change MX records to Google but still run Local Mail Exchanger in Mail Routing Settings.
Upgrade/Downgrade an Account
To change account quotas, you must upgrade or downgrade an account.
Main > Account Functions > Upgrade/Downgrade an Account
Suspend/Unsuspend an Account
Main > Account Functions > Suspend/Unsuspend an Account
Suspending an account with limited bandwidth will not work. You still need to modify the account’s bandwidth limit.
Main > Account Functions > Limit Bandwidth Usage
Terminate an Account
Main > Account Functions > Terminate an Account
You can delete all the information about an account or keep the DNS zone. This is required if you moved a domain between servers in the same DNS trust relationship and want to remove the old domain.
Account Information
List Accounts
To see all accounts and quotas, indicate cPanel username or the package assigned, navigate to:
Main > Account Information > List Accounts
These options, as well as others described below, are also available on the left panel.
By clicking the ‘+’ sign next to the main domain of a resold account, you will get a form allowing you to alter the cPanel account’s password.
Show Accounts over Quota
The next menu allows you to see accounts that use many resources. It is most useful for shared hosting.
Main > Account Information > Show Accounts over Quota
View Bandwidth Usage
To see the account using too much bandwidth, go to:
Main > Account Information > View Bandwidth Usage
DNS Functions
The DNS Functions tool contains all DNS records of a cPanel account including A records, NS records, and CNAME, among others. You can change any value by navigating to:
Main > DNS Functions
All necessary records are automatically created. If you are not sure about the process, do not change anything to prevent domain name malfunction.
Add a DNS Zone
This feature allows setting up of a DNS zone on your server which is an administrative space or part of the domain name system. It directs traffic to the correct locations.
If you add a domain to your server, WHM automatically configures its DNS zone. The ‘Add a DNS Zone’ feature is for adding DNS zones for remote domains.
Exercise caution while adding a DNS zone. Incorrect configuration of DNS data prevents visitors from accessing a domain.
Main > DNS Functions > Add a DNS Zone

WHM – add DNS zone
Under Account Selection, you can see a list of domains and users presently on your server.
To search the list, enter a partial domain or username in the proper text box under ‘Account Search’ heading.
WHM will show options that match your search criteria. Click the correct domain or username. You can now see the account under ‘Account Selection’.
Delete a DNS Zone
This tool allows you to erase DNS zones from your server. You may remove multiple zones or delete a single zone.
Main > DNS Functions > Delete a DNS Zone
You can also delete multiple zones by using command-click in Mac® OS or control-click in Windows® to choose zones you wish to remove.
Click the first desired zone and shift-click the last zone if zones are arranged in the list to include all the zones in between.
Edit a DNS Zone
This feature enables editing of records in a domain’s DNS zone file.
Edit DNS Zone screen will display a table of editable text fields that contain DNS entries for the domain.
Main > DNS Functions > Edit a DNS Zone
The column headings are:
Domain – name associated with the entry.
TTL – The time to live or duration the DNS entry should be cached by the client.
Record type – refers to the type of DNS record.
You may see several DNS record types:
- SOA means start of authority record that contains authoritative information on record with an accredited domain name registrar (about the domain).
- NS refers to a nameserver record that specifies the hostname clients prefer when looking for your domain.
- A is an address record that matches your domain name to an IP address.
- MX is a mail exchange record matching your domain name to a list of servers handling mail for your domain, tagging each one with a priority (the highest priority is 0).
- CNAME is the “canonical” name record that matches your domain name to an alias. It is useful if you run a server besides Apache like the FTP server on a separate port.
Feel free to go through the full WHM documentation.