How to Use SQL Database in cPanel
Learn how to efficiently utilise SQL databases in cPanel.
Brief Background
Assuming cPanel powers your website hosting requirements, you may create new Structured Query Language (SQL) databases through its easy to navigate interface. The database connects to a CMS like WordPress or Drupal. It also separates website content from the other elements.
SQL refers to an international standard for inquiring about and retrieving information from databases. cPanel supports two of the most common database platforms. These are MySQL® and PostgreSQL. Database systems represent complete SQL server and database solutions.
Users may interact with MySQL and PostgreSQL databases. You can likewise opt for different programming languages. These consist of Hypertext Preprocessor (PHP), Perl, and Python. MySQL and PostgreSQL are considered open-source apps which are free of charge either for business or personal use.
Users can implement changes in their websites without editing pages individually. You can create and manage the SQL database using the database menu of cPanel. As website owners, you must consider four essential points.
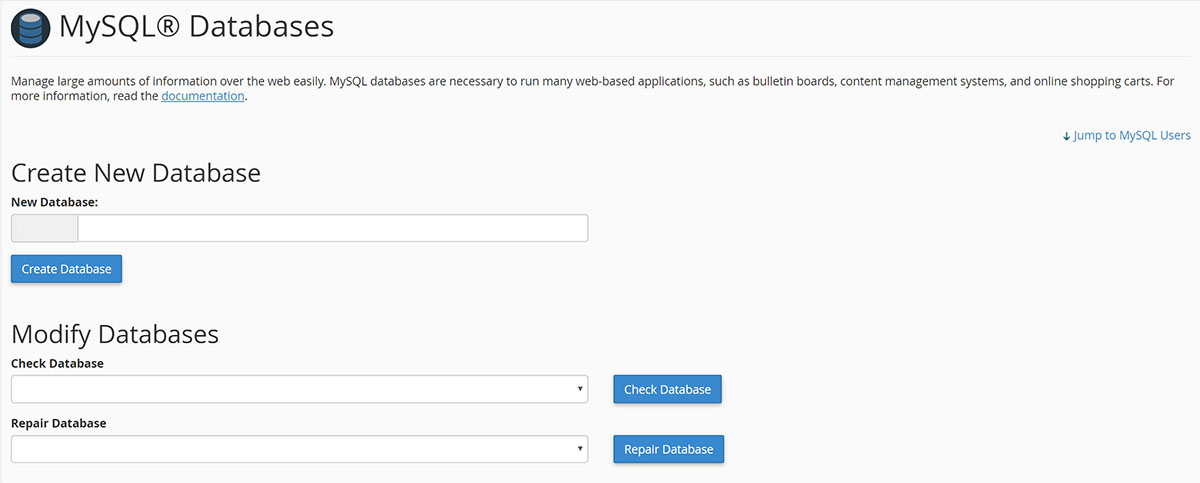
- Set up a new database. Type your name on the “New Database” text field. The text will be prefixed automatically with your cPanel log-in account and underscore. For instance, “yoursite_database1”. Click Create Database after finishing this step.
- Create new user for this database. Scroll down to “Add New User” menu. Input a user name in the “Username” text field. It is prefixed with your cPanel username.
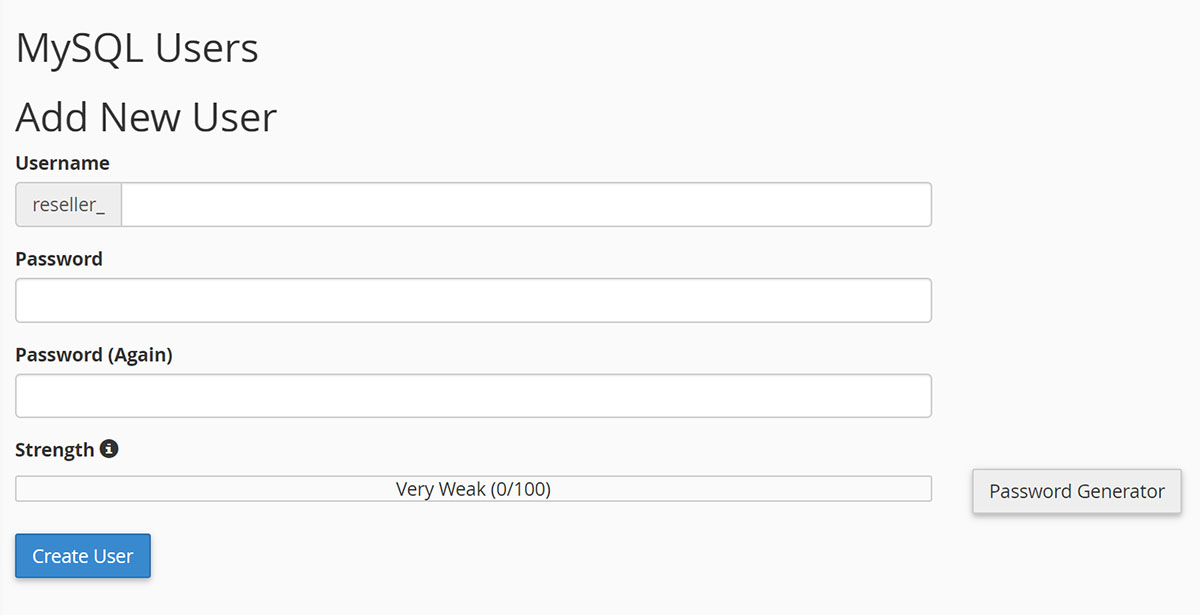
- Enter a password for the account. Click Generate Password if you want cPanel to create a password. Click Create User once you have completed this.
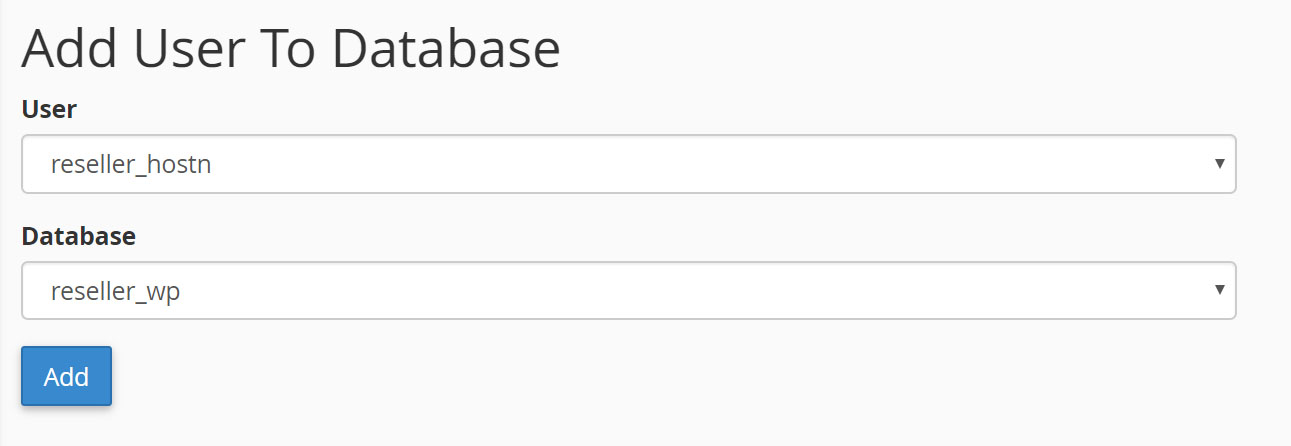
- Connect the user account to this database. Look for the user and database from the drop-down menu below “Add user to database” header. Click Add when you have finished. You have now created a database and user account. You may input the database name, username, and password to the CMS in connecting these two entities.
How to Delete a MySQL Database
You must employ the root user or user with capacity to delete in removing the MySQL database.
- Typ
mysql -u yourusernamehere -p
found in the MySQL terminal. Once prompted, input your password. Delete the unnecessary database through the “DROP DATABASE name goes here;” command.
- You require a user with super DELETE privileges on the specific database.Otherwise, utilise the root user.
- Navigate to MySQL Command Line Client. Browse to terminal view (Command Prompt on Windows). Type
mysql -u yourusernamehere -p
Enter your password.
- At the MySQL terminal enter “DROP DATABASE name goes here;”. Or, “SHOW databases.” View the users visible list to confirm the database was deleted.
How to Restore a User’s Database Access
Users who cannot access databases have the chance to restore users’ grants to the database. Look for the Restore Grants utility.
Restore Grants Script
Use this script in restoring user’s database access by running one of the commands from the command line interface or command language interpreter.
-
/usr/local/cpanel/bin/restoregrants – cpuser=$cpuser – db=$type – dbuser-$dbuser
-
/usr/local/cpanel/bin/restoregrants – cpuser=$cpuser – db=$type – all
Find the list of variables for examples shown above:
| Variable | Represents | Examples |
| $cpuser | Username of cPanel who lost access to the database | username |
| $type | Type of database Mysql for MySQL Pq for PostgreSQL® |
mysql |
| $dbuser | Database user who wants privileges restores By using the –dbuser flag, dbuser represents Database users By using –all flag, script restores grants for database Users who own the cPanel account |
dbusername |
Update password of cPanel users
It is possible for Restore Grants Script in returning access to the database.
WHM or cPanel users who own reseller accounts or system administrators can reset the account password if the script breaks down.
The cPanel user can restore grants through the following steps:
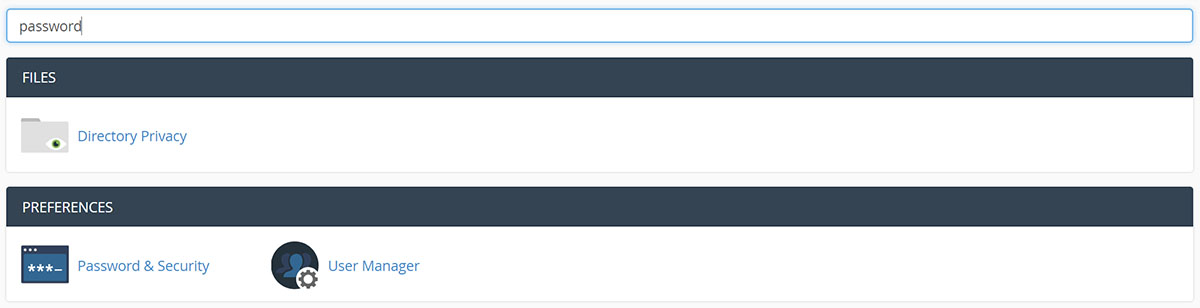
- Go to cPanel’s Password & Security interface(cPanel >> Home >> Preferences >> Password & Security).
- Choose Allow MySQL password change.
- Type the old password in the Old Passwordtext box.
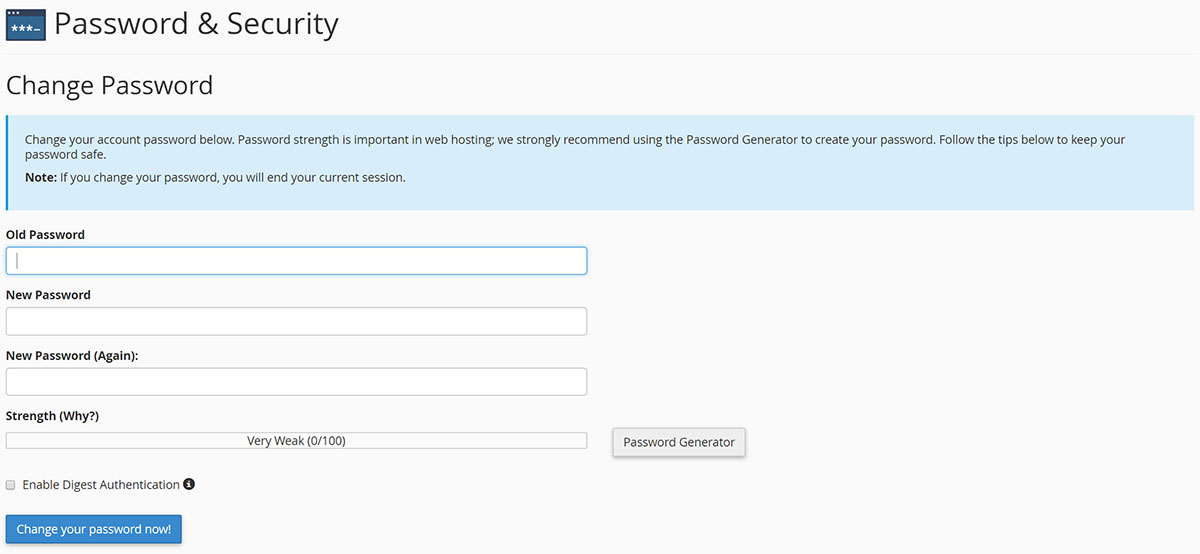
- Type a new password in the New Passwordand New Password (again) text boxes.
- Click Change your password now.
Server administrators and resellers have the capability to restore grants.
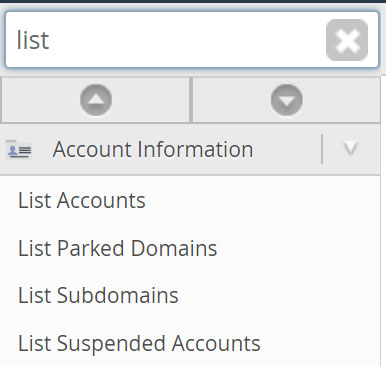
- Look for WHM’s List Accounts interface (WHM >> Home >> Account Information >> List Accounts).
- Click the + link next to the appropriate account.
- Choose Sync MySQL password with account password.
- Type a new password in the Change Passwordtext box.
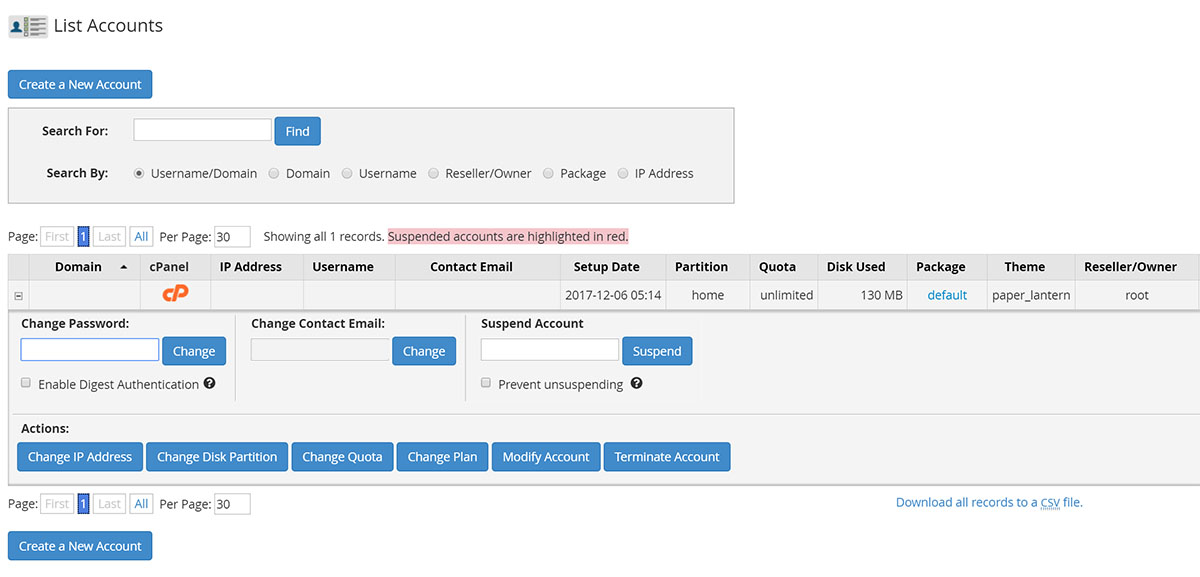
- Click the icon Change.
Install or Update PostgreSQL on Your cPanel Server
It is advisable for an expert like the database administrator to perform installations or updates of PostgreSQL on the cPanel server. However, even amateurs have the capacity to install and update because of the simple and short process. Database backup is equally important.
See to it data on the server is duplicated or ‘backed-up’ as precautionary measure before starting the installation process. It can be restored after completing the installation. Said rule applies if users prefer to update the software. Log in to your cPanel account. Verify yourself as the root user using Secure Socket Shell (SSH). Run the prompted command – pg_dumpall > db.out.
Postgre (Install, Update, or Configure)
For cPanel users, follow these steps to install or update the PostgreSQL:
- Users must run this command:
usr/local/cpanel/scripts/installpostgres
.
It will start the whole process. - Go to the Configure PostgreSQLinterface of the WebHost Manager. Just click the SQL Services option at the WHM Home page.
- If you plan to install the app for the first time on your device, click the Install/Config option available. If the PostgreSQL has been pre-installed, this command will override previous commands, so you can perform the same function. This also applies to updating the PostgreSQL.
- Once it has been completed, users may include existing cPanel users to the PostgreSQL. Use the Create Users command.
- For security purposes, root users must select difficult account passwords.
After finishing the procedures, you may safely import and restore all databases. Choose this command: psql dbname < dumpfile.sql. In short, you can move on after the process of updating or installing PostgreSQL stands is completed.
Steps in Basic Troubleshooting
It is not hard to perform simple troubleshooting. Nonetheless, it sometimes happens that installation or making updates fail to complete. In this case, the user may revert temporarily to the previous PostgreSQL version. You can accomplish the process by running the following commands.
- Service postgresql stop
- Mv/var/lib/pgsql/var/lib/directory_file_name
- Mv/var/lib/pgsql/var/lib/pgsql
- Service postgresql restart
Troubleshooting MySQL Profiles
Troubleshooting MySQL Profiles means determining steps and solutions if you encounter issues while connecting the MySQL server with the remote server.
The following list will have errors to the left along with corresponding solutions. In case you cannot connect to the remote server, check the settings of the DNS configuration and confirm the Internet Protocol address of the local server. See to it the remote server is responsive. Authenticate the remote server’s firewall configuration for both remote and local servers.
Improper SSH port- Confirm the SSH port in the remote MySQL server. Type the correct SSH port.
Invalid SSH credentials- Verify the remote MySQL server’s correct username as well as password.
In case the hostname is not allowed to connect to the MySQL server, it is possible to allow access to the user. Type the following:
# mysql -snip-mysql> CREATE USER ‘user’@’hostname IDENTIFIED BY ‘password’; Query OK, 0 rows affected (0.00 sec)mysql> GRANT ALL PRIVILEGES ON *.* TO ‘user’@’hostname’ WITH GRANT OPTION; Query OK, 0 rows affected (0.00 sec).
If you happen to lose connection to the server, the first thing to do is verify the DNS configuration settings. Make sure it is the latest version and functional.
Reverse DNS Entry
Before you try to set up the remote My SQL server, the remote server must have the capacity to connect the host name of your server to the IP address. Log in to the remote server using the SSH port. Confirm this function and follow the host command which reads:
root@server [~] # host 208.77.188.166
166.188.77.208. in-addr.arpa domain name pointer or www.example.com
root@server [~]
See to it that you add an entry for the hostname on the remote server’s /etc/ hosts file. In case you do not have a reverse DNS entry already configured for the hostname.
Opt for Remote the MySQL root password.
To change the MySQL root password in WHM’s interface (the name of MySQL root password), you can use the interface itself. You can accomplish this by navigating to WHM>> Home>> SQL services>> MySQL root password. If you are using the MySQL root server, the remote server can be chosen as default. As a result, be sure you select properly between the local and remote server’s password. This will depend on which one you prefer to change or modify.
If the MySQL server happens to be the cPanel server, reactivate the profile of the hosting server. Then, update the configuration file of the remote MySQL server.
These are the four major aspects of the MySQL Database in cPanel.
Looking what to read next? Visit Installing and Using mytop for MySQL Performance Monitoring on a cPanel Server.