How to Move WordPress to a New Shared Hosting Server
Having difficulties with slow website hosting even after you have optimized WordPress speed and performance means one thing.
It is about time that you transfer your WordPress site to another host capable of dealing with increasing traffic.
In migrating WordPress to a new shared web hosting server, look for a capable provider like JOLT Hosting UK which offers this service as a separate package. Choosing a reliable host can help you to avoid the stress and handle more serious issues that may arise in the future.
One of the major risks you should take into account in switching hosting or transferring to a new shared hosting server is a possible downtime and loss of data. This is where you have to be careful to avoid problems than can hamper the progress of your site. Here are the detailed steps in moving your WordPress website to shared hosting servers correctly.
Back-up Files

To begin with, the best practice is to back up all elements of your website before making any significant changes. Besides, this step is a prerequisite before moving your WordPress site. Plugins are available for backing up your website manually. It is advisable to utilize a File Transfer Protocol program that connects to your host.
Make copies of all files in your directory to a separate folder on the desktop computer. The .htaccess file is supposed to be hidden. Check out the FTP Help file to make concealed files accessible. However, the process may take some time subject to the number of media uploads in your website. Proceed to the second step while the download is in progress and make a copy of the database.
Export the Database
Exporting or conversion of the database is a straightforward process which requires basic steps for completion.
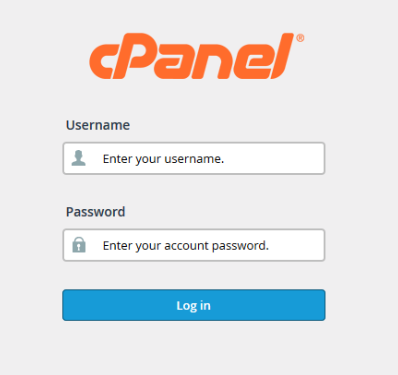
- Log in to your web server’s cPanel account.
- Open the phpMyAdmin app.
- Find the database containing your WordPress installation located at the list on the left portion of the sidebar.
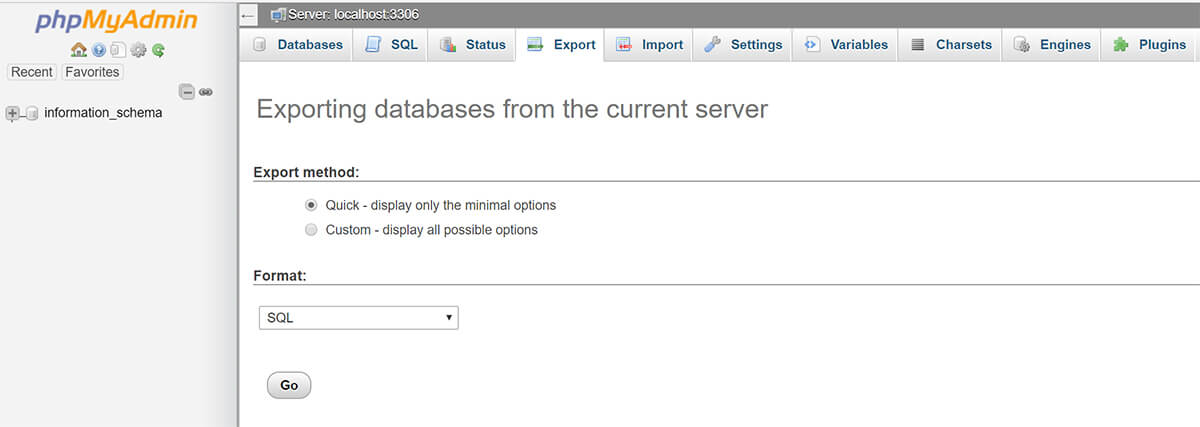
- Click on Export tab found on the navigation menu. You need the Quick Export option and Structured Query Language or SQL format for exporting.
- Click on the Go button to initiate the database export procedure. This will download a file to your computer.
- You can move to the next stage as soon as the database export as well as FTP transfer of files is finished.
Create Database on the New Hosting Server
It is necessary to set up an environment for WordPress installation before starting migration to share hosting. You need to import SQL data to your database.
- Log in to the new host using credentials supplied by the provider.
- Connect to the cPanel software.
- See to it your web host runs the MySQL Database app. Otherwise, get in touch with the company’s technical support team to determine the hosting firm’s techniques in producing new databases.
- Note down the simple steps in creating a database.
Open your MySQL database. Build a new one with suitable name for your site.
Create an account with secure password.
Add the user account to the newly-created database complete with all privileges.
- Make sure to keep a record of your MySQL and database names as well as password.
Editing WP-config.php file
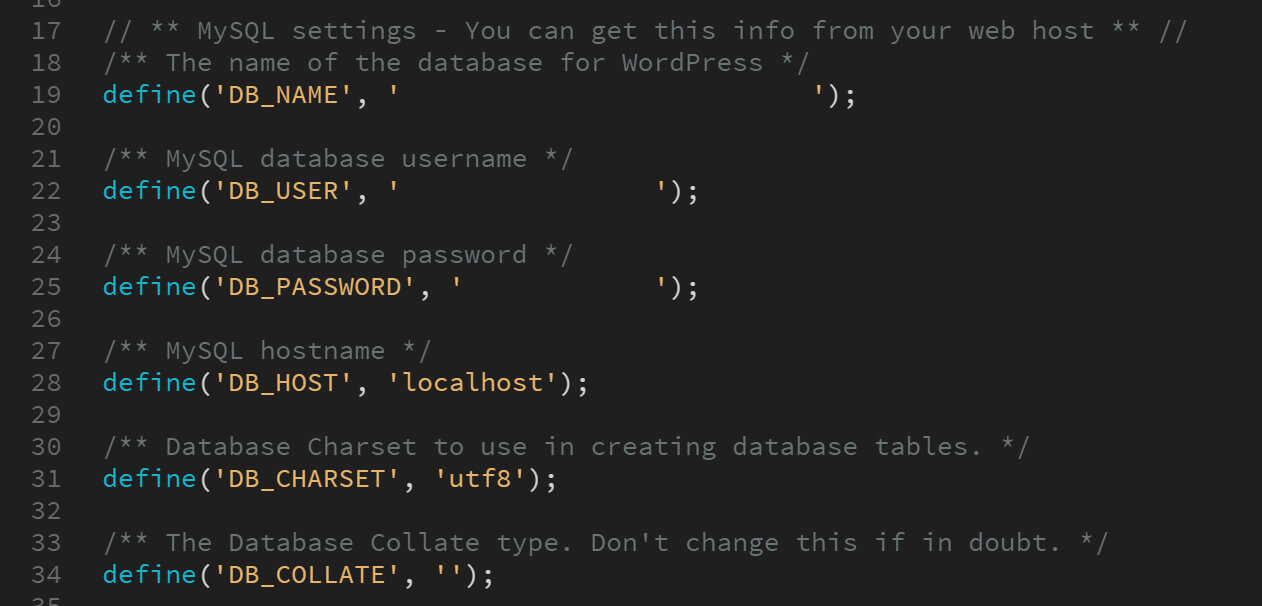
Navigate to the folder where you downloaded website files (documents). Look for the file named WP-config.php which regulates access between the CMS and database. Copy said file and store in another folder on the same PC. This step is needed in restoring modifications in case something goes wrong during the process. Open the file’s original version using text editor and implement the following changes.
- Change your database name by locating this line: Define DB_NAME or db_name which will be set according to the new database.
- Change your user password. Edit the third line. Define DB_PASSWORD or db_password. You need to change the db_pass section of this particular line to a protected password created for the MySQL user. Save WP-config.php before closing the file.
Importing the Database
You can now proceed further with the import process after getting your new database.
- Launch the phpMyAdmin open-source admin software from cPanel on the new server. Choose your new database from the list and click on the Import tab from the navigation menu.
- Select Choose File button at the File to Import section. Look for the SQL file that you chose earlier.
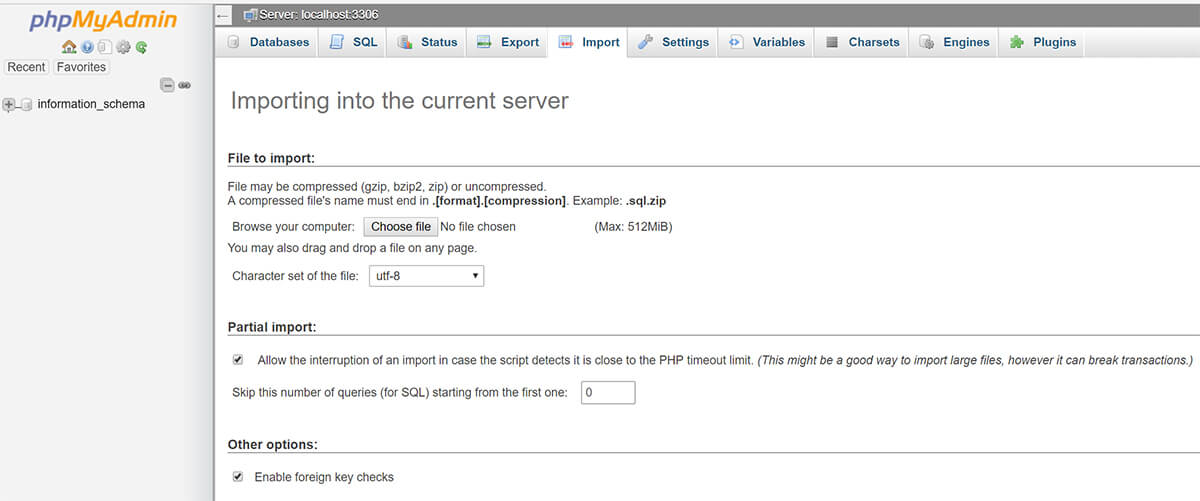
- Uncheck the Partial Import box. The format should be set to SQL.
- Click on the Go button to start the database import process.
- You will receive a message notification after the successful conclusion of importing.
Uploading WordPress Files to Shared Hosting
The next step is to upload your WordPress files to the new server. Connect to the web host through the File Transfer Protocol. Navigate to the folder where your website will be located. For primary websites or those that will be installed on the web server, you should upload files to the directory, public_html folder.
You may upload website files after choosing the remote directory. This should include the WP_config.php updated version. Downloads normally take longer similar to the previous process. Avoid deleting any file from your local PC after uploading. These are still necessary until the final steps are finished.
Prevention of Downtime
Change the hosts’ files to prevent any downtime. Access the installer Php file in your browser after uploading files to your new web host. You can use the following URL in accessing files: http://www.example.com/installer.php. This URL may bring you to the old host causing a 404 error. The possible reason is the domain name still points to the old host.
To deal with this concern and ensure 100 percent uptime, locate the IP address of the new hosting server. Log in to the cPanel dashboard. Click on the Expand Stats link at the left sidebar. Your server address will then be listed as Shared IP address. Replace the Internet Protocol address copied from cPanel and example.com from you domain name. Save the changes. You can now gain access to your files through the new host with your domain name on the PC.
Link New Uniform Resource Locator and Define New Domain
Read this step if you will move to a new or different domain. Otherwise, skip it since you are not compelled to update your website. Some users who decide to move their websites have the tendency in adding links to posts on their sites or inserting images directly by pointing to a Uniform Resource Locator (URL) on the server. It can result in breaks when moving to a new domain.
Check out the Search & Replace Database plugin if you want to replace your old domain name. It will make things easier for you. However, do not forget to delete the script as soon as you are finished for security reasons. Likewise, do not store the script in your root domain. Instead, create a temporary folder with random name for hosting this script.
Searching for and replacing the old with the new domain means modifying the Site_URL as well as Home URL values in your database. As a result, you are not redirected to the old domain after trying to log in to your website on the new domain.
Final Step
This stage consists of two separate phases with several days of gap between each one. It is necessary to reconfigure the Domain Name Settings or DNS. This sets to “point to your old host”. Point the proper records to the new server (IP) address.
DNS changes normally take a maximum of 24 hours for full dissemination. The best time to perform the process is when traffic flow is relatively low. Avoid making any changes to your site during this period. Otherwise, it may lead to unnecessary changes to the website’s old version. Once the 24-hour duration expires, you can access the new host without any problems.
Connect to your old host and delete the database and files. Maintain a backup copy of said database and files together with the original WP-config.php in case you have to restore this database and program. Store the files for an extended period to be safe. The entire process is not complicated provided you break it down into simple steps. JOLT Hosting UK will guide you during the migration and fix any common WordPress issues.
This guide was prepared by JOLT Hosting UK, one of the most reliable cloud web hosts in the United Kingdom with website at http://www.jolt.co.uk/.