Guide to Setting Up an Email Forwarder in cPanel & Webmail
cPanel and Webmail users can refer to this guide for step-by-step processes when it comes to email forwarders.
Let’s start with the fundamentals. Understand the definition of basic terms. Email forwarding refers to the process of sending emails delivered to the recipient’s email address and transmitted to another address. The email forwarder permits the user to send a copy of the message to a different address automatically. It is effective for business operators who need to send information to multiple addresses.
Just send the email to a single account. You need not check several accounts anymore. It is possible to achieve this task using the cPanel system or Webmail login page. Webmail indicates free Internet-based accounts such as the popular Gmail, Yahoo, and Bing. Users gain easy access to their emails if there is stable Internet or Wi-Fi connection as well as web browser. However, you cannot view old emails or create new messages offline.
Two Kinds of cPanel Forwarders:
- Email Account Forwarder
- Domain Forwarder
The Global Email Filter relies on the domain name. By creating the domain forwarder, you send all messages to the specified domain. Be careful of said option. It overrides the present domain setting for all email accounts. Here is an example: Set up a forwarder for domain1.com and send to domain2.com. You need an email account to deliver emails. These are not created for the user automatically.
Users must understand the essentials of the email filter on the cPanel dashboard. Email filters adopt the parameters users identify to establish proper handling of email messages. You have the choice of discarding and redirecting emails to other addresses or file them in a separate folder.
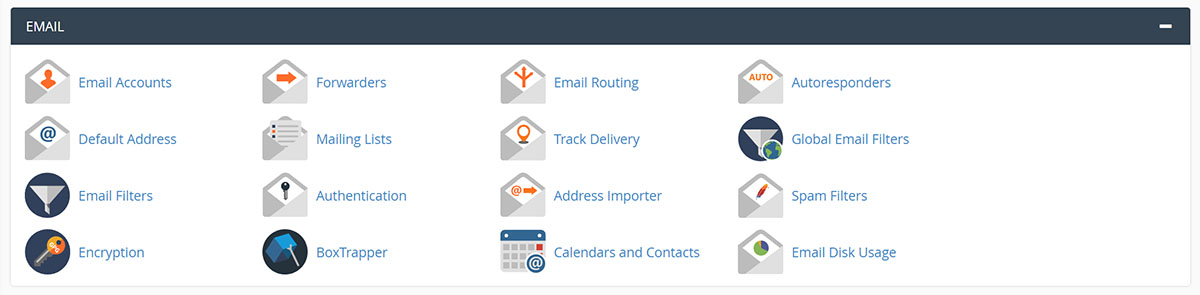
Email Filter Setup
The cPanel email filters provide users with additional levels of control over emails, particularly Spam. It offers two phases of filtering. These are Individual and Global. Both have the same settings. However, Global applies to addresses connected to your domain.
- Log in to your account in cPanel.
- Scroll your browser down to the Email section.
- Click the ‘Email Filter’ tab.
- The Email Filters screen will come out.
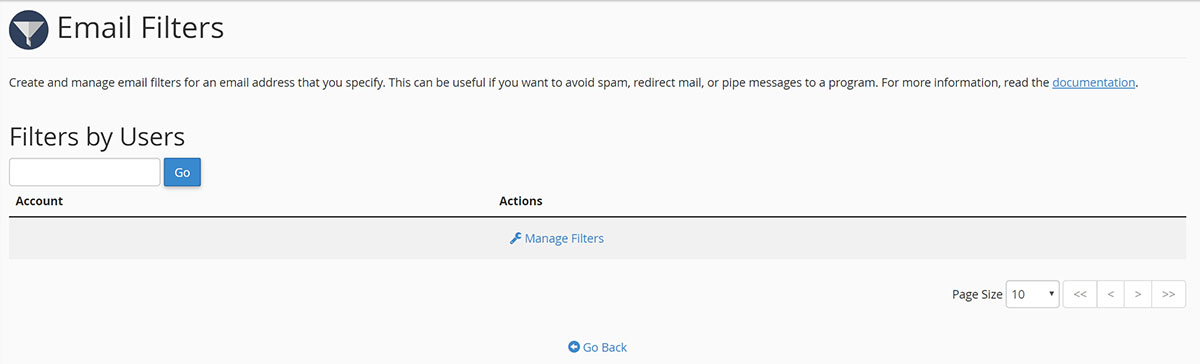
- Find the selected email address you wish to filter. Click the ‘Manage Filters’ link. This is in the ‘Filters by Users’ section.
- The Edit Filters for Email Address screen comes into view.
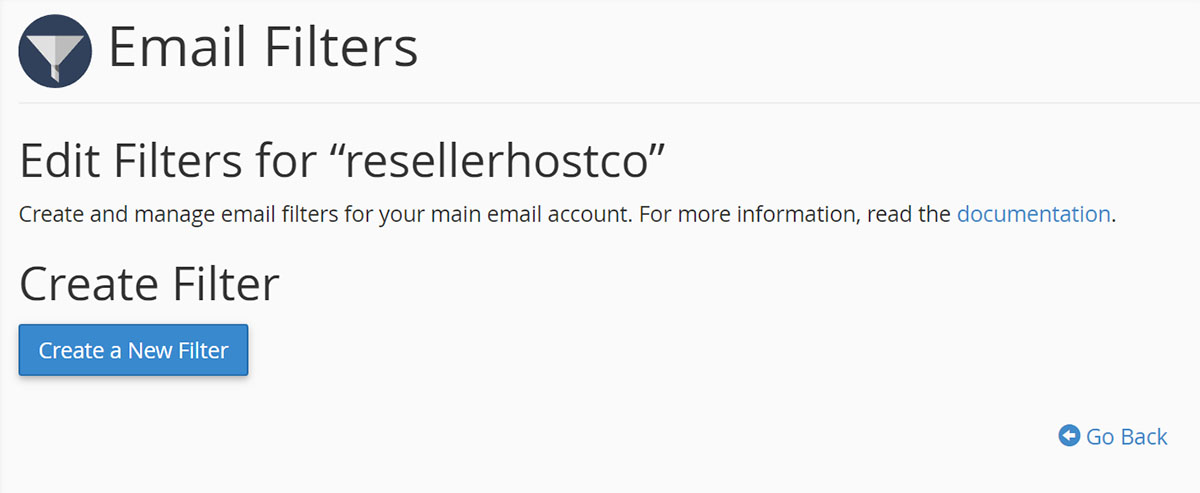
- Click the button which says Create New Filter.
- Enter a unique name for your filter in the Filter Name field.
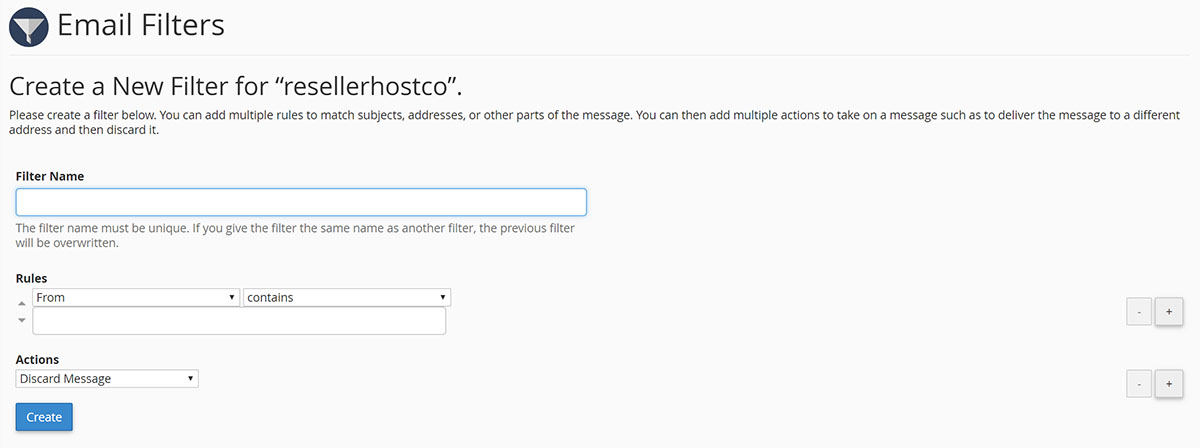
- Enter the word or phrase for filtering. It is beneath ‘Operator’ and ‘Criteria’ fields.
- Choose the Preferred Action you want to happen if an incoming email matches the new rule.
- Click the Create button to produce the filter.
Catch All Email & Email Forwarders
These Catch All emails do not function on shared server accounts. These are allowed only on Virtual Private Servers and dedicated servers. The Catch All email account refers to an address that receives messages sent to the wrong email address in a domain. To set up, perform the following steps:
- Log into your cPanel account.
- Click ‘Default Address’ in the Mail section.
- Choose the domain name for the Catch All. You can find this in the drop-down menu under ‘Send All Un-Routed Email for’. The options include ‘Discard with Error to Sender’ (Simple Mail Transfer Protocol or SMTP connection time) and ‘Forward to Email address’.
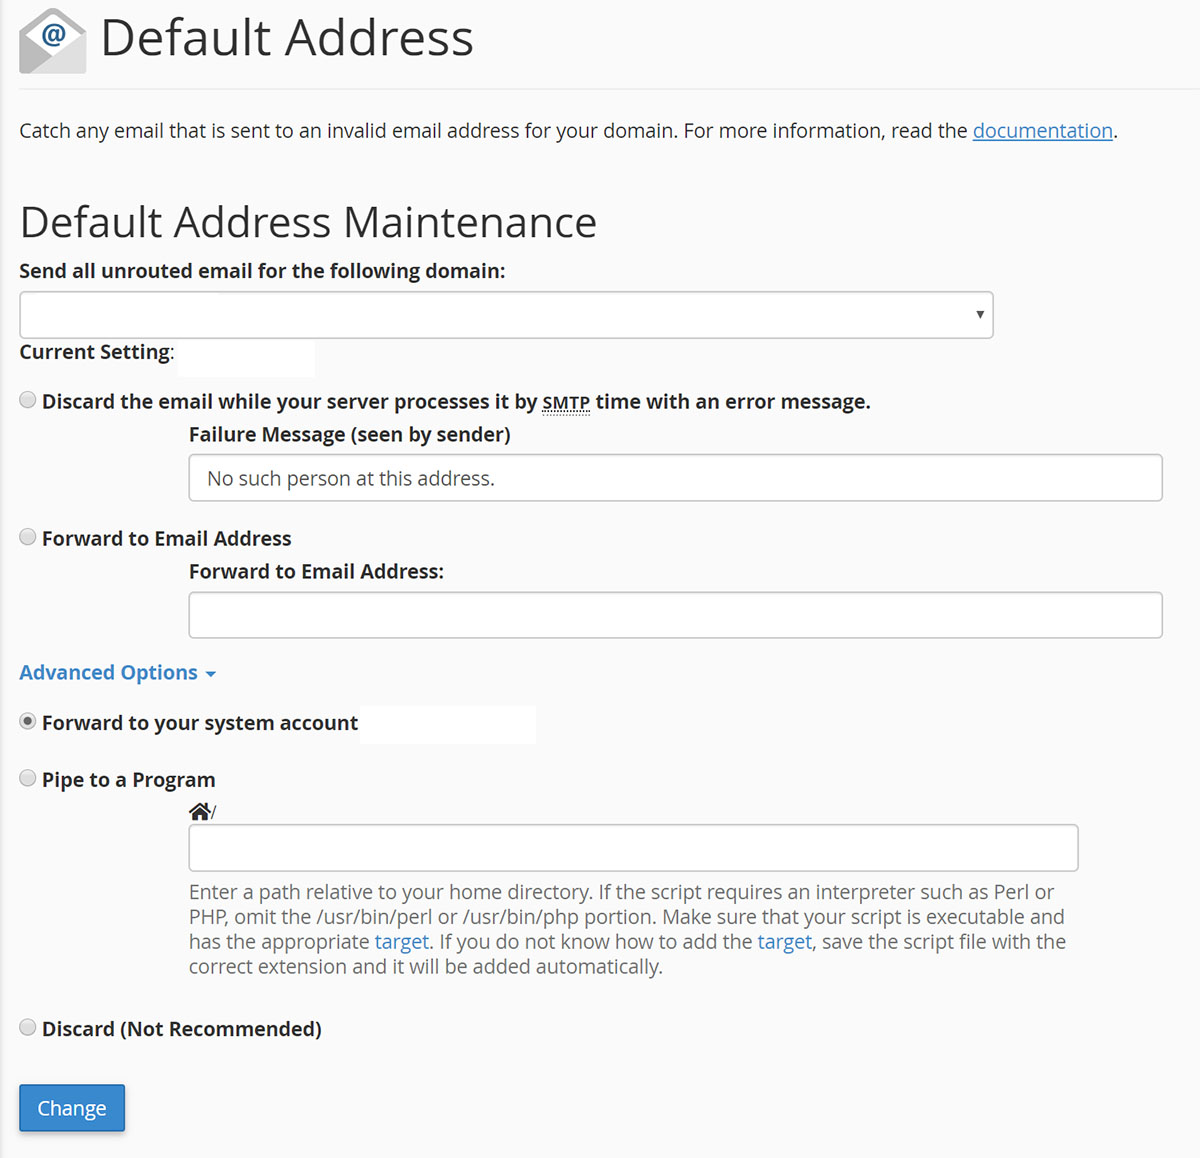
- Click Advanced Options (discard or pipe to a program).
- Click Change to finalise setup of the Catch All address.
You may forward messages from an email account to another automatically through the configuration of email forwarders in the cPanel platform. Other options are the following:
- Transmit messages from one to multiple accounts by creating several forwarders.
- Send messages from a non-existent account to another account. For example: You may not own an info@example.comemail account configured on your server. Nevertheless, you may set up a forwarder that sends messages from info@example.com to a preferred account.
How to Add Email Forwarder
- Click the Forwarders icon at the cPanel home screen’s Mail Section.
- Click the ‘Add Forwarder’ tab.
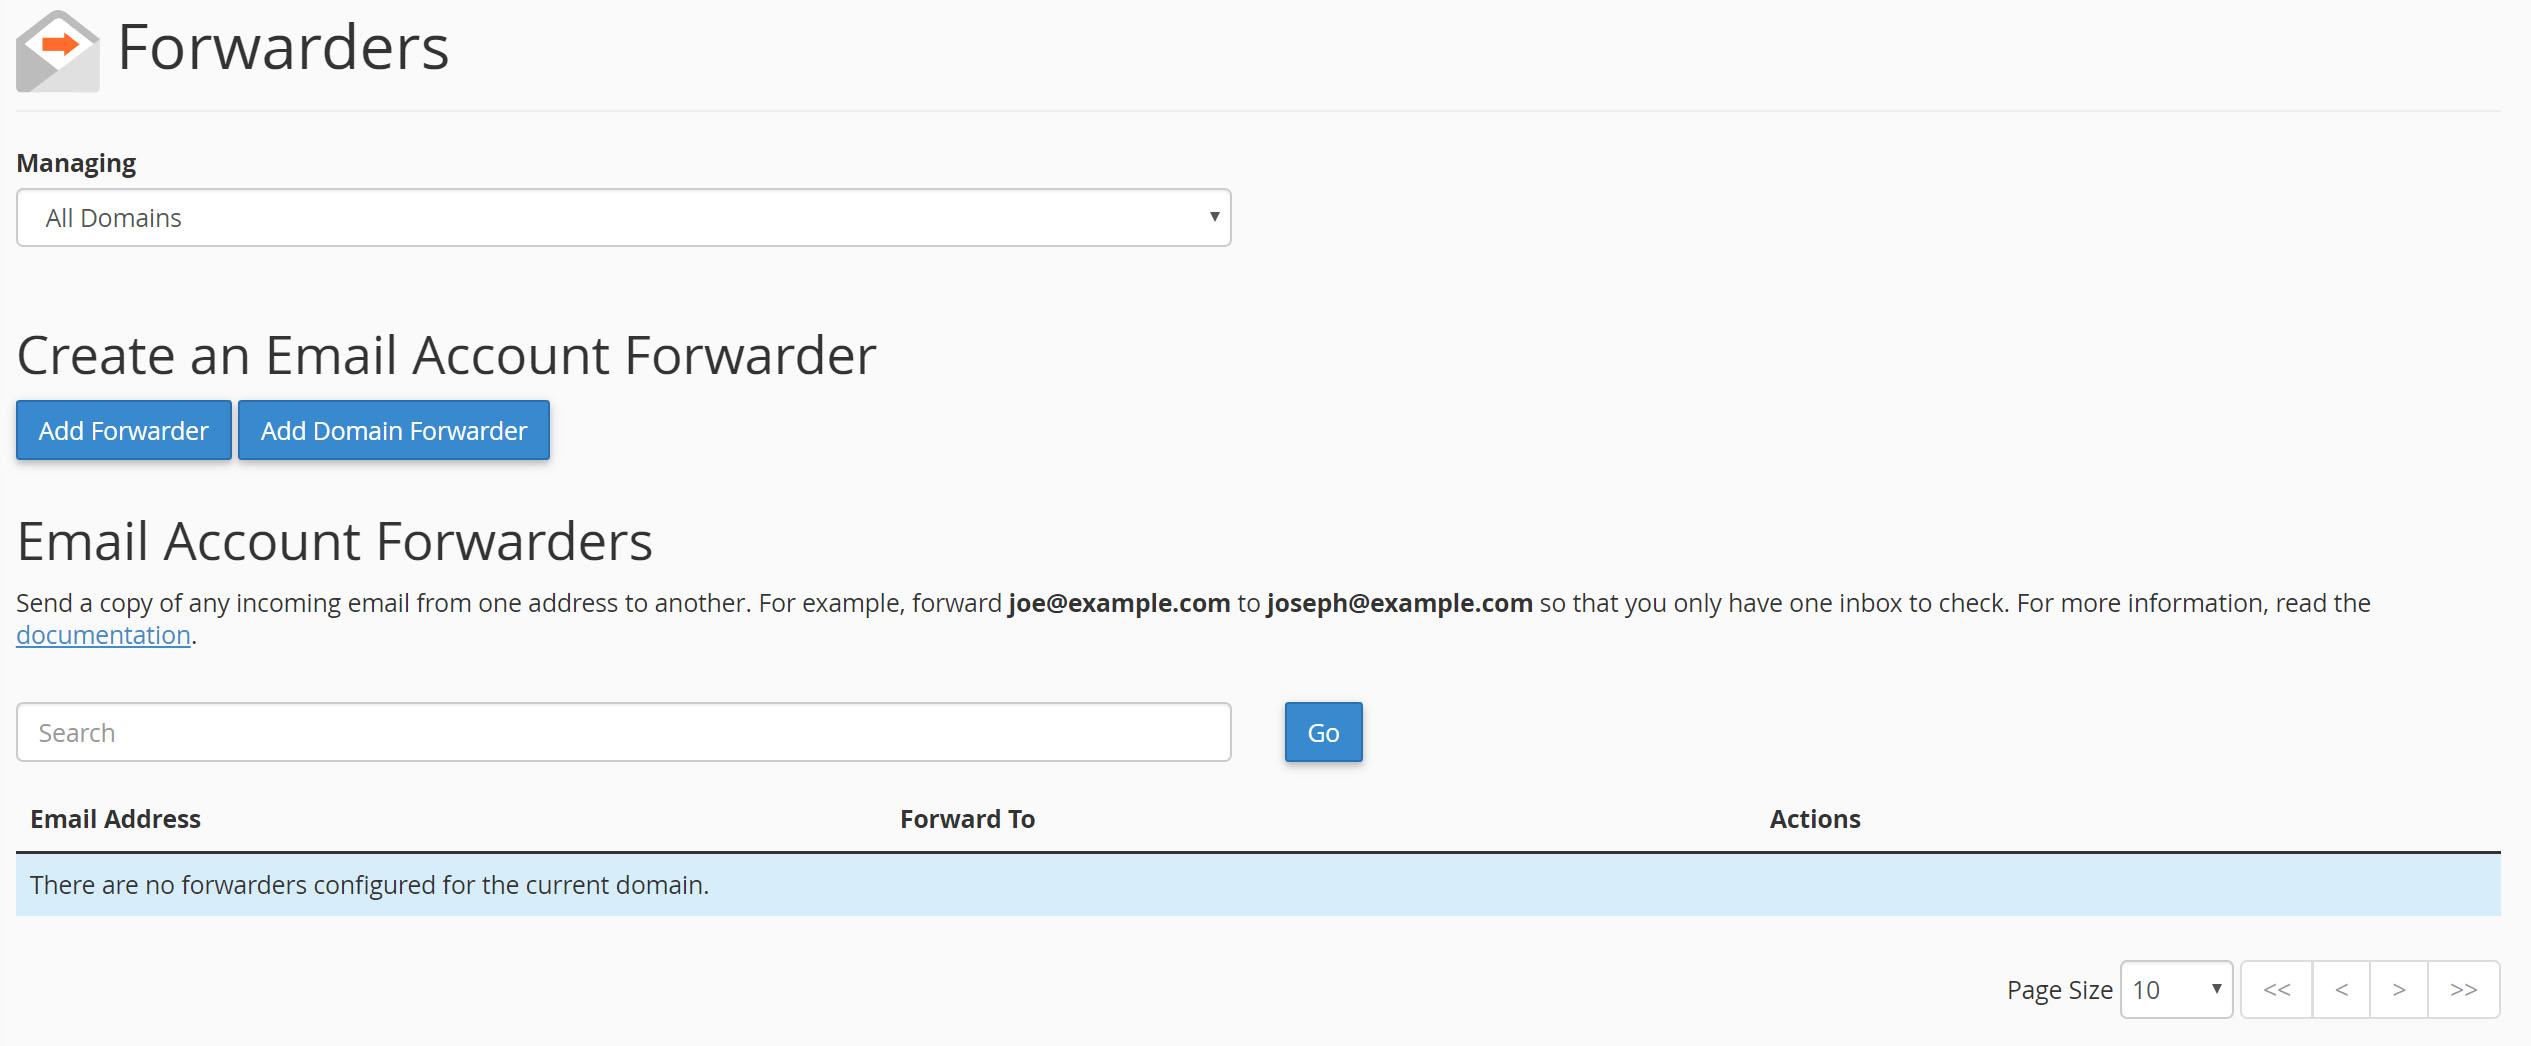
- Enter the email address where you want to forward any message at the ‘Address to Forward Text Box’.
- Identify the destination for your forwarded messages. Enter the email address. Discard the message. The sender receives an error notification. Discard the error to sender. Otherwise, you can set the text for error messages as an option.
- Click Add Forwarder.
How to Delete the Email Forwarder
Users can delete unwanted email forwarders. However, you may not make changes to these forwarders. Instead, delete the forwarder and create another one. These are the steps for deleting the forwarder.
- Click Forwarders in the Mail Section of cPanel Home Screen.
- Click to delete anything you want to erase beside the forwarder.
- Confirm the erasure by clicking Delete Forwarder.
Creating Forwarders in Webmail
- Log into your Webmail account. You can do this by navigating to example.com at webmail. See to it that you use the complete email address as Username and Password related to the email account you want to log into.
- Confirm that you logged into the right email address. Click the Forwarders
- You can see at the following screen that no Forwarders have been set up. Click the ‘Add Forwarder’ tab.
- Fill in the field with the designated email address. Click the Add Forwarder
- Return to ‘Forwarding Options’. Make sure the forwarder was set up correctly.
The cPanel Spam Protection
Email spam or junk email refers to unsolicited messages sent in volume through email. Nearly all email spam messages are advertisements or contain disguised links that look like credible websites. On the contrary, these are links to phishing websites that host malicious software or malware.
Phishing means the illegal practice of sending email messages allegedly from reputable portals to convince consumers to reveal personal financial information like bank accounts and credit card numbers as well as passwords.
How Do You Enable Spam Protection?
- Click the ‘Box Trapper’ tab. This potent anti-Spam tool protects users’ inbox by compelling all email senders (not in your White List) to answer a verification noticed before you accept their email messages. Box Trapper maintains this list of addresses. Most spam messages originate from fake email addresses. The verification system falters. The message is not cleared for delivery. Spam messages are deleted after some time.
- Click the ‘Manage’ tab to enable the Box Trapper for the email address.

- Click the Enable
- Click the Go Back
- Configure the Box Trapper Settings. At this point, you have several choices which include the automatic White Listing for your preferred email addresses.
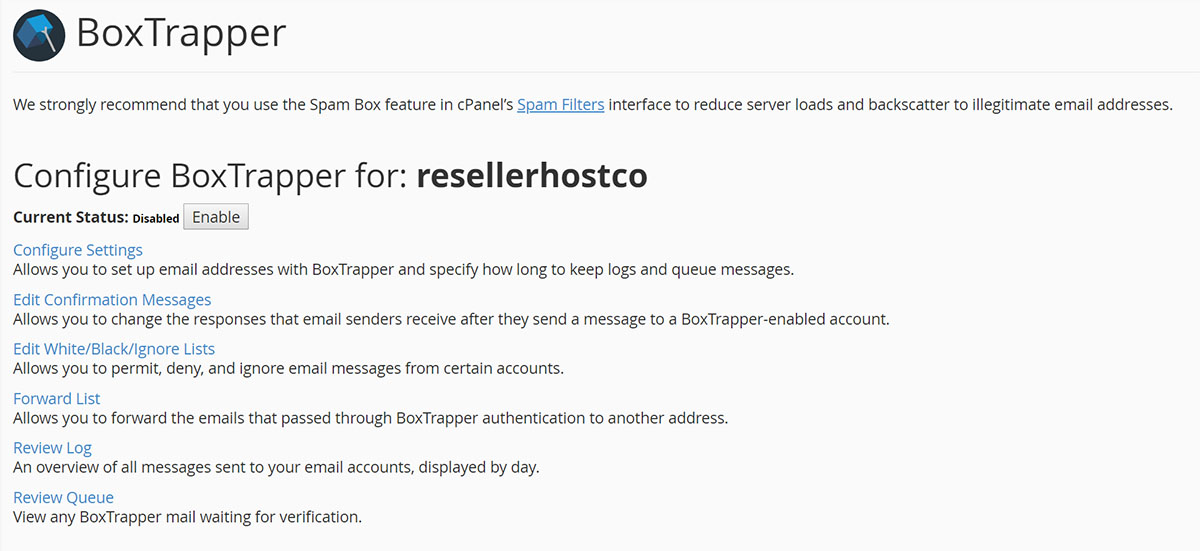
- Click Edit Confirmation Messages. You can edit standard confirmation messages that have been set up.
- Click the Edit White, Black, or Ignore Lists.
- You can now edit or change/add addresses to the White List, Black List, or Ignore List. After setting up Box Trapper as you intended, you will see a substantial reduction of spam messages.
Another tool is called SpamAssassin. The Apache SpamAssassin refers to the application for filtering Spam mail. It is usually incorporated into ther mail server to filter emails going to a website. The tool may be configured to support choices of end-users. It is possible to use the SpamAssassin with Box Trapper for maximum control.
- Click Enable SpamAssassin.
- Click the Go Back
- Configure SpamAssassin.
- Set up the Black List with email addresses which you identify as Spam.
- Add the email addresses to the White List which are not considered Spam.
It is not mandatory to make use of these two methods simultaneously. Choose one that you believe can afford maximum protection versus Spam.
Email Authentication
Shared and reseller hosting do not support the Domain Keys Identified Mail or DKIM even with the cPanel configuration. The reason is shared as well as reseller servers use third-party filtering services in reducing outgoing Spam. The service performs the email header changes not compatible with the DKIM.
DKIM confirms that incoming messages come from a sender. At the same time, the message was not modified while in transit. Once the Domain Keys Identified Mail is enabled, the sender signer recovers the sender’s public key and verifies the signature. If it happens to be invalid, the message is presumed forged and considered Spam.
Sender Policy Framework
The SPF helps in preventing spammers from duplicating messages that associate your domain as the sender. For that reason, SPF can also minimise the number of bounce messages that you get. This is also called backscatter spam. SPF utilises DNS records specifying mail servers and IP addresses permitted to send messages from a domain. You may adjust or change configuration after enabling the Sender Policy Framework.
We hope these guidelines answer your questions regarding the proper way to set up email forwarders, filters, and other related concerns.
To learn more about Email accounts in cPanel, visit How to Create Email Accounts on Shared Hosting.