How to Use the R1Soft Site Backup Feature to Restore Your Files

You can use the R1Soft Restore Backups cPanel plugin to restore your account’s files or folders. This paid feature and related cPanel plugin is accessible with annual or monthly billing arrangements.
Go to your cPanel->Files and click R1Soft Restore Backups icon as shown in the screenshots.
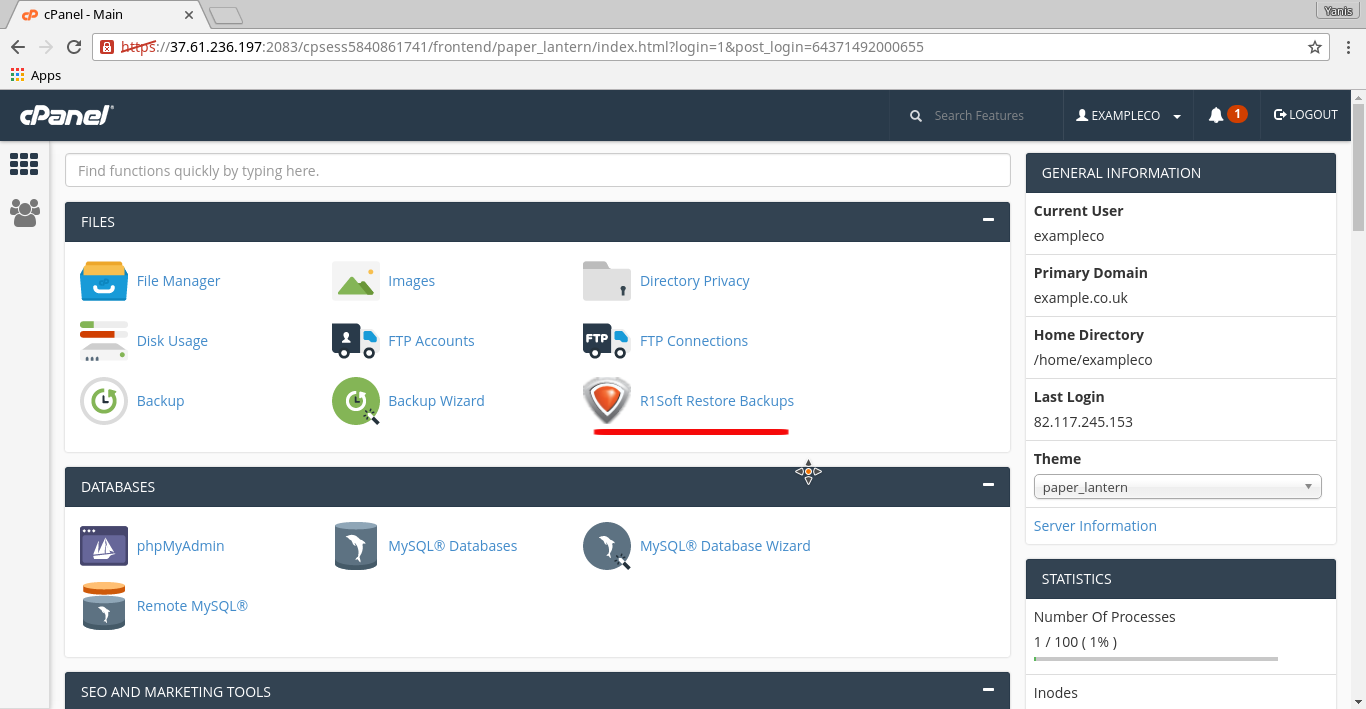
- This is a Basic cPanel interface
- This is the R1Soft Backup interface
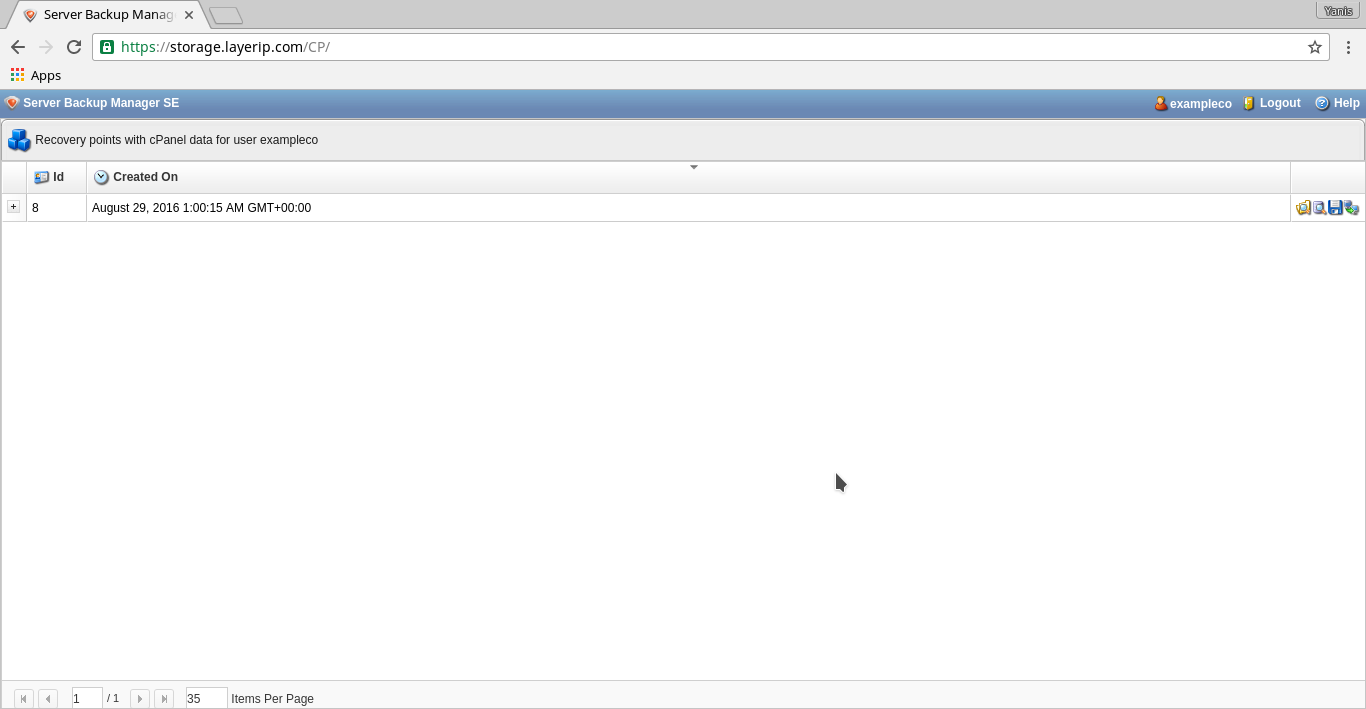
You have several available options for recovery point in the R1Soft Backup interface:
- Browse files in the recovery point.
- Browse databases in the recovery point.
- Download archive with all files and folders in the recovery point to your device.
Click the Download button. You get the prompt to save the control-panel-user-data-YYYY-MM-DD-HH-MM-SS.tar.gz archive file on your local device or workstation. - Send archive with all files and folders in the recovery point to the home directory of your cPanel account.


Click Send to Agent button to upload control-panel-user-data-YYYY-MM-DD-HH-MM-SS.tar.gz archive file automatically to your cPanel account’s home directory.
Replacing or restoring selected files and folders:
Follow the instructions below if you need to automatically replace or restore some or all files and folders under your cPanel account home directory.
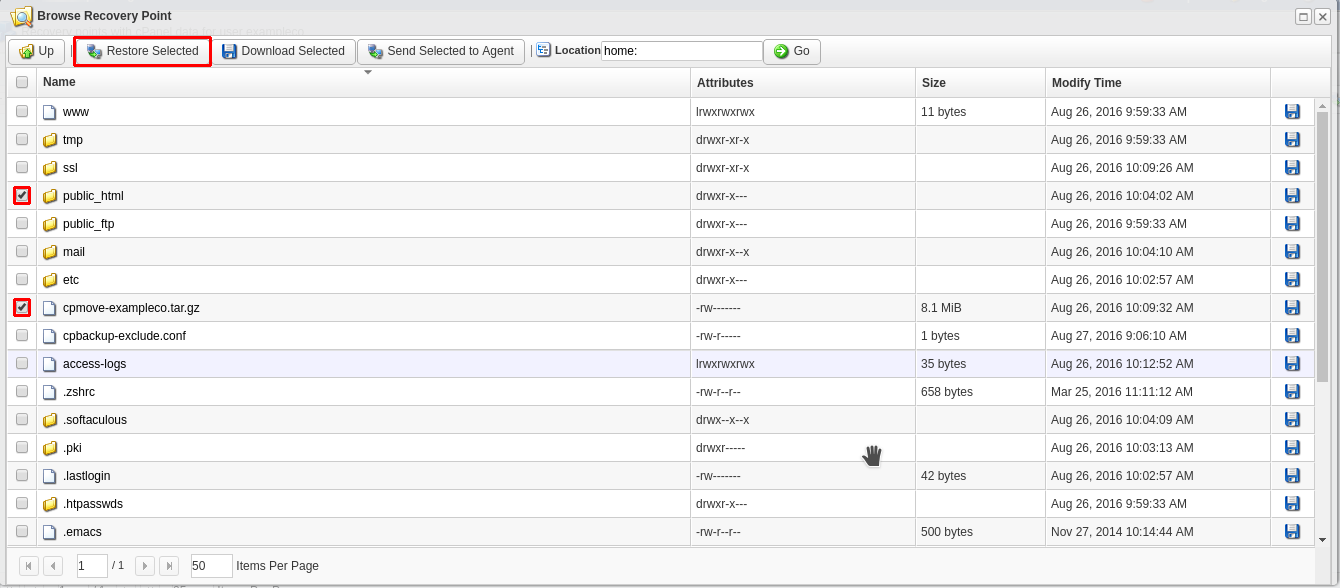
- Click the “Browse” button to look through files and folders under recovery point. This will open a new Browse Recovery Point window.
- Go to desired location (double click folder).
- Check files and folders to replace or restore.
- Click Restore Selected as seen on the screenshot below.
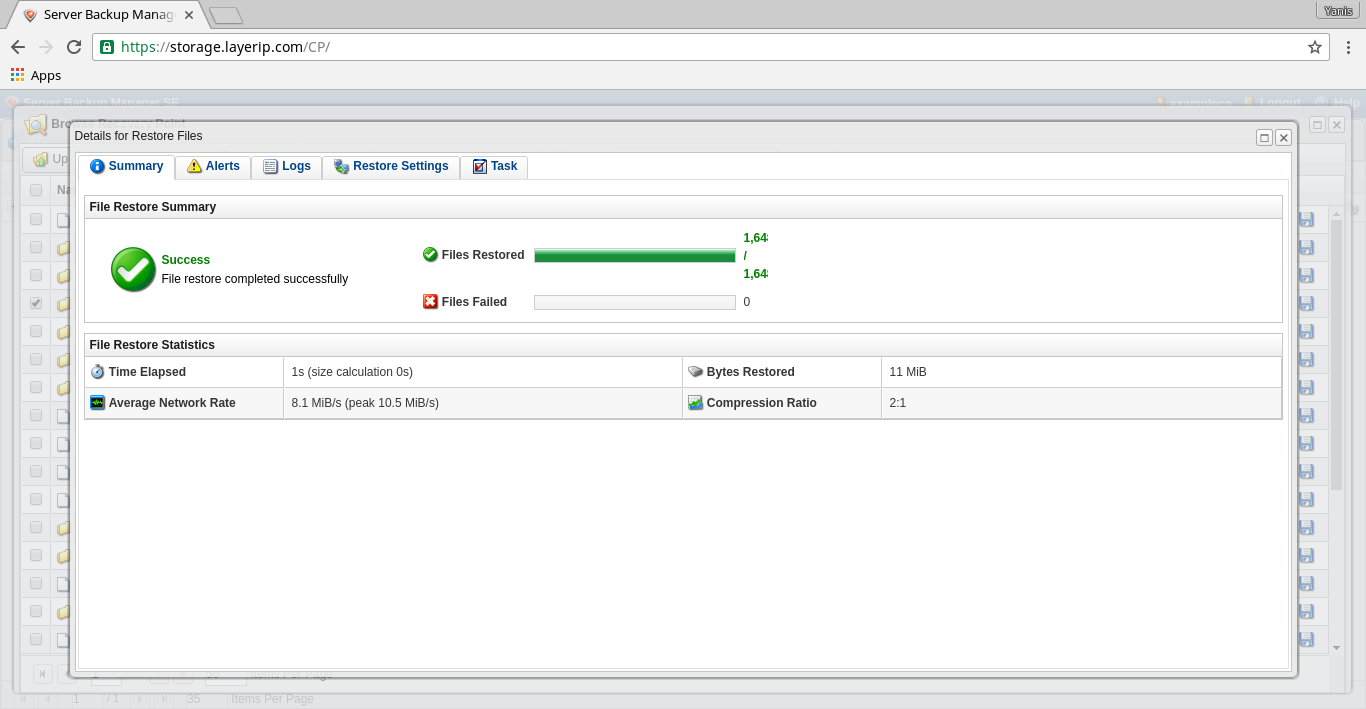
Complete information about restoration process
Go to the information window. After completing restoration process, you will see “Details for Restore Files” window. Close that window and check replaced or restored files and folders.