How to Setup Email on Mac Mail Leopard
Browse through the tutorial to set up your system of sending and receiving emails on MacOS Leopard. Jolt will make sure emails function seamlessly on Apple and Mac mails.
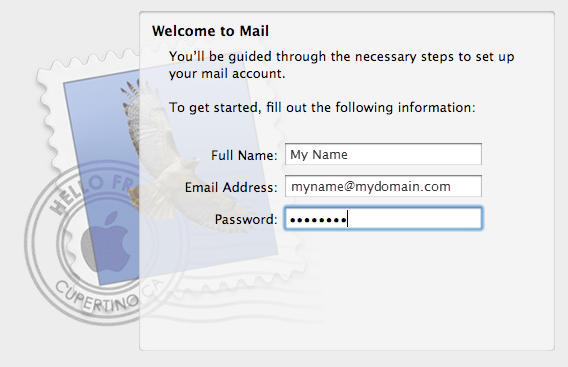
Start your MacMail e-mail client. If this is the first time you are configuring your e-mail, a wizard will pop up to help you find the configuration. Otherwise, proceed to:
File > Add account
- Indicate your name and email address.
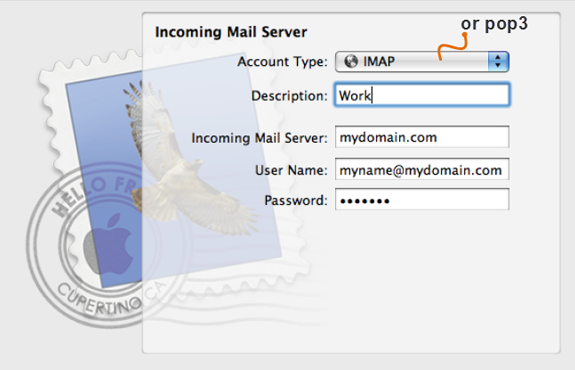
Incoming mail server
- Account Type: IMAP or POP3
- Description: [Optional – You may leave it blank]
- Incoming Mail Server: Domain or server name
- User Name: [Your e-mail address]
- Password: [Your password]
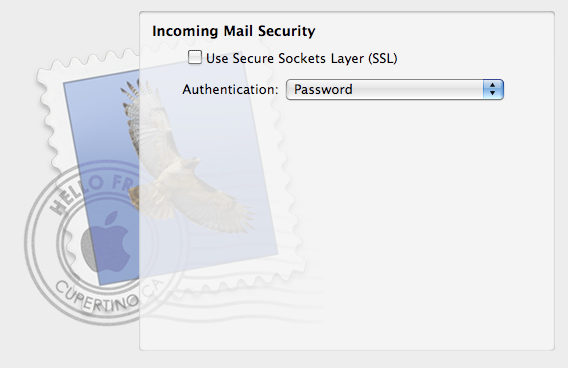
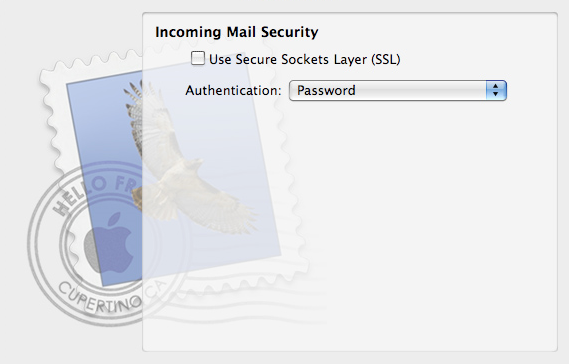
The Incoming Mail Security window will only pop up if the attempt to identify the settings is unsuccessful.
If you see it, please choose the ‘Password’ for Authentication and press ‘Continue’.
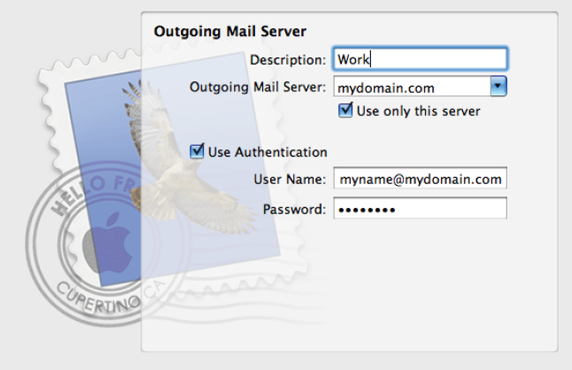
Outgoing mail server
- Description: [Optional – You may leave it blank]
- Outgoing Mail Server: Domain or server name
- Check ‘Use only this server’ box.
- Check ‘Use Authentication’ box.
- User: [Your e-mail address]
- Password: [Your password]
The Outgoing Mail Security will pop up if the attempt to identify the settings is unsuccessful.
If you see it, please choose the ‘Password’ for Authentication and press ‘Continue’.
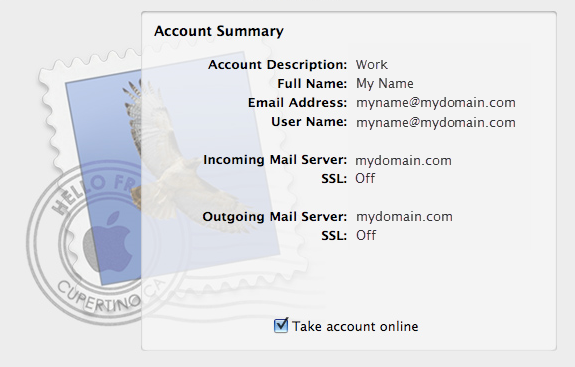
The account summary will appear at the last step.
Check the ‘Take account online’ box to receive mail after clicking ‘Create’.
Additional incoming mail server settings
For additional incoming server settings, go to:
Mail > Preferences > Accounts > Choose an account
Press ‘Advanced’ in the right-hand section.
Additional outgoing mail server settings
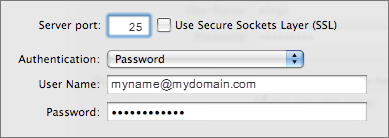
For additional outgoing server settings, go to Mail > Preferences > Accounts > Choose an account.
Mail > Preferences > Accounts > Choose an account
- Look for the Outgoing Mail Server (SMTP) in the dropdown menu in the right-hand area.
- Choose ‘Edit Server List’ from the dropdown.
Press ‘Advanced’.

