How to Use Softaculous Auto Installer
With 439 scripts and counting, Softaculous is the most popular auto installer for cPanel as well as other control panels. It helps users to install applications with one click of a button.
Follow these simple steps to install your desired application:
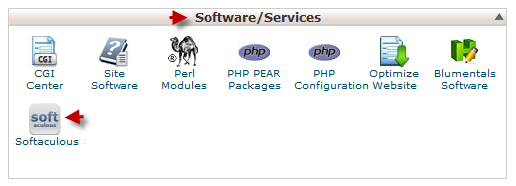
- Log in to your cPanel account (for example, mysite.com/cpanel) and go to Software and Services > Softaculous
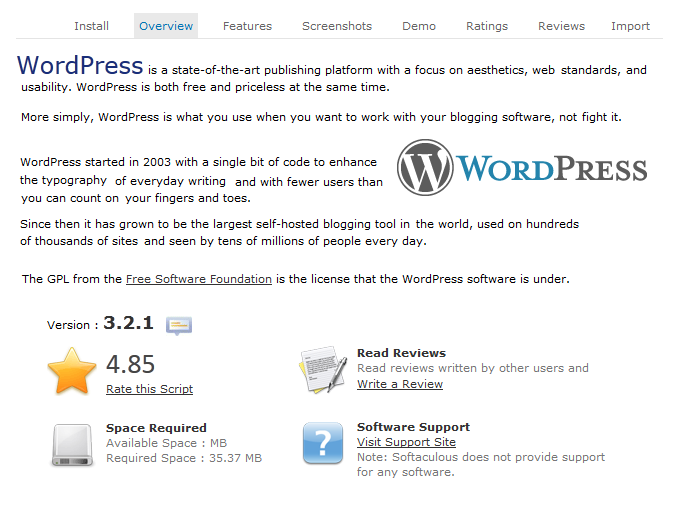
- From the menu on your left, select the script you want to install. You will be redirected to the script’s overview.
In the overview, you will find the script’s current version, and rating, as well as how much space you will need to install it. You can also read software reviews here.
You might also want to peruse this section to learn more about the software’s features, view screenshots, and try your hand with the demo version before installing it.
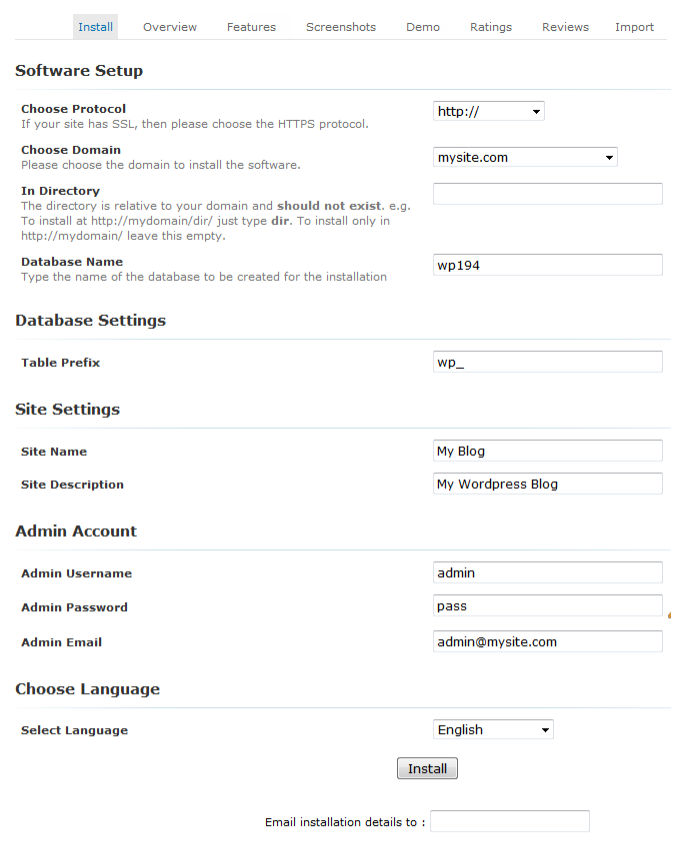
Installation form
- Choose Protocol – choose SSL from the drop-down menu if you have it installed. This is mostly used for shopping carts.
- In Directory – leave this field blank if you wish for a particular software to be available via mysite.com. If you type a directory name, Softaculous will automatically generate it and install a script in that directory, hence a software will be available via mysite.com/directory.
- Table Prefix – each and every one of your databases will have the following name format, where ‘cpaneluser’ is table prefix:
cpaneluser_databasename
Where ‘cpaneluser’ is the table prefix.
Softaculous sets the software abbreviation as table prefix by default. This will be done automatically so there is no need to change it to your cPanel account name manually.
- Admin Account – the login information to a software back-end section. Aside from cPanel which is used for managing hosting accounts, you will have distinct admin panel to manage any software you install, through which you can add content and manage themes, among others.
Click ‘Install’. You will then be forwarded to the ‘Congratulations’ page where you will find a link to navigate your new website.


