How to Set Up Email in Outlook 2010
In setting up MS Outlook 2010 to send and receive emails, go to Outlook and follow the steps below:
1. Go to:
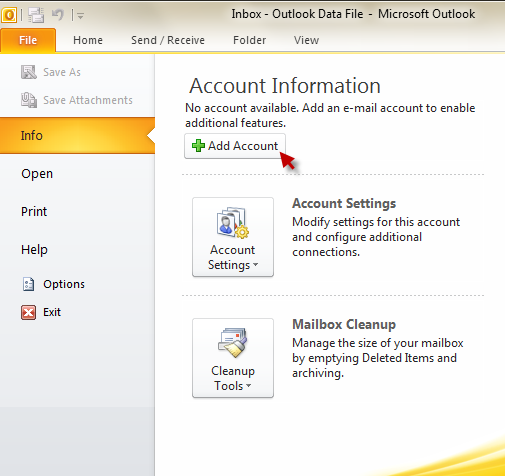
File > Info > Add account
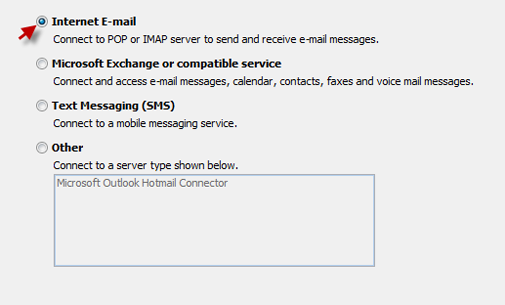
2. Choose ‘Internet Email’ and click ‘Next’ to proceed.
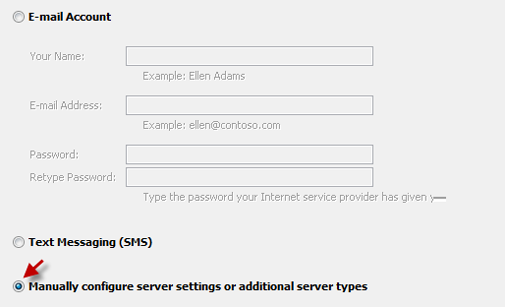
3. Indicate ‘Manually configure server settings or additional server types’.
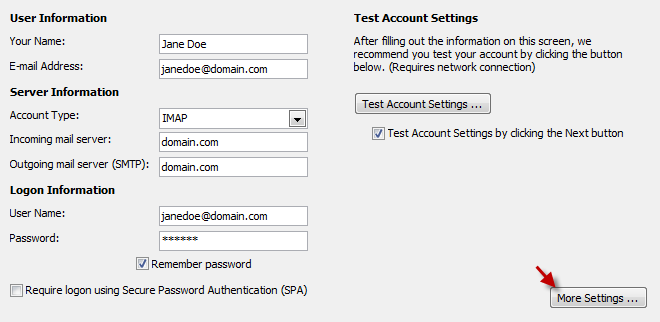
4. Fill in requested information:
- The full email address must be username (including @domain.com)
- Port numbers must be
POP3: 110
IMAP: 143
SMTP: 25 or 26
- Incoming and Outgoing Mail server: domain.com. Do not use ‘http://www’. ‘mail.’ prefix can be omitted.
- Choose POP3 for downloading emails to your PC.
- Choose IMAP if you want these on the server.
DO NOT Check “Log in using Secure Password Authentication (SPA)”.
SPA is widely used on MS Exchange servers. Our servers are Linux-based. Hence, enabling this feature prevents you from connecting to the server.
Complete the form by clicking ‘More Settings’.
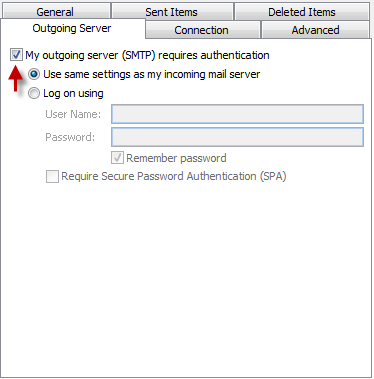
5. Proceed to ‘Outgoing Server’ tab and check:
My outgoing server (SMTP) requires authentication
Use same settings as my incoming mail server
Click ‘OK’.
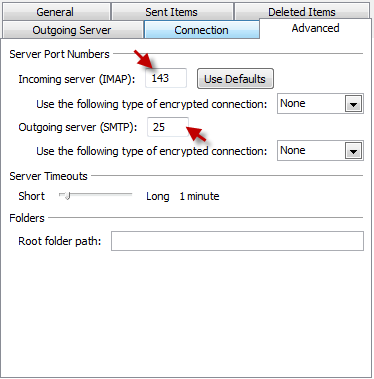
6. Navigate to ‘Advanced’ tab and check if ports are correct.
Incoming mail server:
IMAP: 143
POP3: 110
Outgoing mail server:
25 or 26
Try the port 26 setting if you cannot connect to SMTP (Outgoing Mail server) using port 25. Some Internet service providers block port 25.
Once everything is set, check your settings by clicking ‘Test account settings’ button.
Or, mark ‘Test Account Settings by clicking the Next button’. The connection will be checked after you click ‘Next’.
If there are connection issues, you will receive an error message.
Re-check your settings or contact support for assistance if this happens.
You will be notified that the email client was successfully configured.
Click ‘Finish’ to close the wizard.

